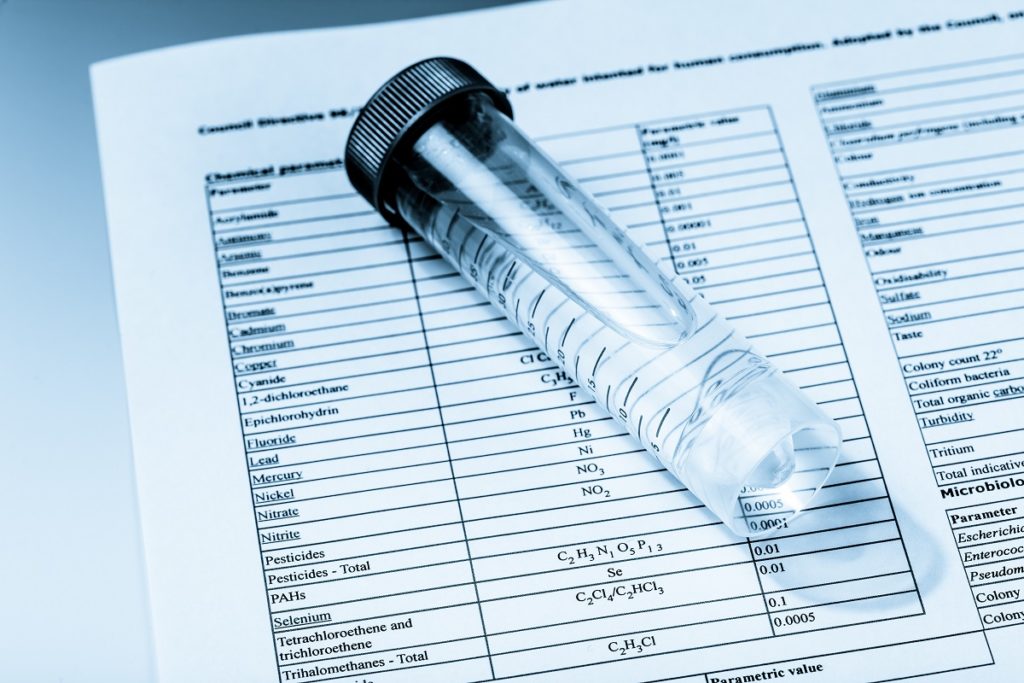
Types of Water Testing Methods
There are a wide range of water quality
tests used to help determine how safe, or even drinkable, water is to be used
in a household setting or otherwise that water test labs perform. These
different types of tests help determine if specific materials of contaminants
have infected a body of water, and help inform how it needs to be further
treated. Here are just a few types of water testing methods.
Bacteria Tests
There are a range of potential bacterial
contaminants that can plague water. One of the most common and most looked for
is E. coli bacteria, which comes from fecal matter exposure and can result in
serious health issues when consumed. Bacteria testing is essential in determining
how safe water is to drink or expose to your skin.
Mineral Tests
The list of mineral testing available could
be a thesis paper, for how many there are. A few common and important mineral
tests include chlorine and chloride, nitrate and nitrite, lead, copper, iron,
zinc, potassium, and sodium. This wide range of mineral testing is essential
and relevant in determining water quality, as different regions or areas of
terrain may have more of a buildup of certain types of minerals, which informs
what kind of mineral treatments the water actually needs in order to be
purified.
pH Testing
What is pH? If middle school science class
feels like an age and a day behind you, here’s a quick reminder. pH is a
measure of the concentration of hydrogen ions in a solution. The more of these
hydrogen ions there are in a solution, the more acidic that water is. Acidity
effects taste of water, but it can also affect how health water is to consume.
Drinking water that’s not neutral enough in acidity can make people sick!
Other Types of Testing
There are some basic water tests that don’t
have anything to do with chemical testing: conductivity, odor, sediment, and
turbidity. Not relevant in all situations, these tests create a measure of the
more physical traits of a water sample. Is it clear, or clouded with sand and
silt? Does it smell swampy, or fresh? How well does it convey electricity—and
what does that say about the mineral content?
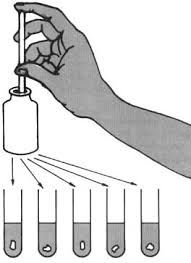
 chemical test of drinking water
 pH Testing Procedure
1. Rinse each test tube with the water sample. Gloves should be worn to avoid skin contact with the water.
2. Fill the tube to the 5mL line with sample water.
3. While holding a dropper bottle vertically, add 10 drops of Wide Range Indicator Solution.
4. Cap and invert several times to mix.
5. Insert the tube into the Wide Range pH Comparator. Hold the comparator up to a light source. Match the sample color to a color standard.
6. Record the pH value.
7. Wash your hands
Test formats
Typical low-tech, portable, field test
methods for chemical water quality monitoring fall into three categories:
- Test strips – These are small, single-use strips that change color to indicate the concentration of a specific chemical. Depending on the particular test, the user “activates” the paper or plastic strip by dipping it into the water sample and swishing it around, or by holding the strip in a stream of water. After waiting for a short time, the user compares the test strip color with a color chart to read the concentration of the chemical. These kits are extremely simple, but they are less accurate than other methods, especially if users don’t follow the instructions.
- Color disk kits – Color disk test kits are available for a wide range of chemical tests. In a typical set-up, the user adds a powder packet or a few drops of a liquid reagent to a water sample in a reusable plastic tube. The user then places the sample tube in a small plastic viewing box. This viewing box contains a plastic disk with a color gradient printed on it. The user rotates the color disk to find the part that best matches the color of the sample, and then reads the concentration of the chemical from the disk. Color disk kits typically have multiple steps and often include prescribed wait times, so they’re a little more complicated and costly, but generally more accurate.
- Hand-held digital instruments – Lightweight and portable digital meters, colorimeters, and photometers are available for water testing. They provide the most accurate results of these three testing methods, but they are also more expensive and delicate than the previous options. These instruments require batteries and calibration.
Ecosystem health indicators
Aquatic ecosystem health indicators can
be broadly divided into four categories:
Physico-chemical indicators
Physico-chemical indicators are the
traditional ‘water quality’ indicators that most people are familiar with. They
include dissolved oxygen, pH, temperature, salinity and nutrients (nitrogen and
phosphorus). They also include measures of toxicants such as insecticides,
herbicides and metals. Physico-chemical indicators provide information on what
is impacting on the system. For example, is it an organic waste that affects
dissolved oxygen, or is it some type of toxicant? Although physico-chemical
indicators can identify the cause of the problem, they only provide limited
information on the extent that pollutants are actually impacting on fauna and
flora. To assess this, we need to assess the biological indicators.
Biological indicators
Biological indicators are direct
measures of the health of the fauna and flora in the waterway. Commonly used
biological indicators in freshwater include various measures of
macroinvertebrate or fish diversity, benthic algal growth and benthic oxygen
demand. For estuaries, biological indicators are less developed. The only
commonly used biological indicator in estuaries is chlorophyll-a, which is a
measure of phytoplankton population density. In coastal embayments, indicators
such as seagrass condition or condition of fringing coral
reefs are sometimes used.
In many aquatic ecosystems, the key
influences on aquatic ecosystem health can be factors other than water quality,
including habitat degradation and changes to natural flow patterns. Therefore,
it is important to include indicators of these factors in monitoring programs.
Habitat indicators
Habitat indicators include both
fringing (riparian) habitat and instream habitats. Indicators of riparian
habitat include the width, continuity, extent of shading and species
composition. Indicators of instream habitat include measures of the extent of
scouring and bank erosion and the presence of woody debris (fallen trees, etc)
that provide important habitat for many species.
Flow indicators
In freshwater, changes to flow are often
the main cause of aquatic ecosystem health degradation; the Murray-Darling
system is an example of this. Assessing the changes is therefore important.
Changes to natural flow caused by humans are varied and include changes to peak
flows, base flows, no flow periods and seasonality of flows. To assess these
different changes, a number of indicators are required. Unfortunately, nearly
all of these indicators rely on the existence of good flow data for both
current and pre-disturbance conditions. This type of data is often not
available. In this situation, less precise indicators of flow change can be
sourced from assessments of the amount of flow captured in storages or
abstracted for agricultural or urban use.
Sample collection bottles
and materials
Before collecting samples, make sure you
have all the proper bottles, field equipment and preservatives, such as ice.
There is nothing worse than being unprepared in the field, so plan ahead as
much as possible. It’s best to obtain sampling bottles from the lab running the
analysis, as some bottle sizes and preservatives used can differ slightly.
The methods that will be flowed will
determine the type of bottles used. For example, samples for metals’ analyses
are usually collected in plastic bottles, while analyses for volatile organics
and pesticides are collected in glass containers. Bottles used to collect
samples for bacteria should be sterilized. The size of the container is
important to ensure you have enough sample to run the analysis needed.
Container size may also be affected by regulation, as larger samples may be
needed to obtain lower detection levels.
Certain analysis like volatile organics and
radon require vials that are to be filled leaving no head space, which keeps
these analytes dissolved in the water, preventing them from escaping into the
air. Additionally, some analyses require samples to be collected in amber
colored bottles. These darker bottles are for analytes that break-down in
sunlight, which helps keep these contaminants from breaking down while in
transit to the laboratory for analysis.