Gas Instantaneous Water Heaters

TEST YOUR WATER HEATER’S TEMPERATURE AND PRESSURE RELIEF VALVE

The thermostat and pressure release valve on a water heater was designed to help keep your family safe. Watch as one of Master Plumbers shows you how to test your water heater’s pressure valve and keep your home’s hot water system functioning properly. In addition to testing the pressure release valve on your water heater, keep your thermostat set at a safe temperature, and flush your water heater annually. This will allow you to keep your system in good working condition and spot any minor problems before they become major issues.

I’m gonna discuss problems that sometimes occur with the temperature and pressure relief valves on the water heaters. Relief valves discharge for usually two reasons

1, there’s excessive pressure building up inside the system that is exceeding 150 pounds of pressure.

2, the temperature inside the tank is exceeding 210 degrees Fahrenheit. Both of these situations can be very dangerous and the temperature and pressure relief valve will open to prevent an explosion

If you notice water on the floor around the water heater and there’s no evidence of a tank or plumbing leak, it is probably a sign that the water heater’s temperature and pressure relief valve has recently opened and relieved itself. First you should test the water pressure in the house by using a pressure gauge that you will screw right onto a hose bib or a faucet.

You could pick up one of these gauges at any home center. Most plumbing codes state that the maximum water pressure coming in the house should be 80 PSI or less. If the water pressure exceeds this amount, a pressure reducing valve will need to be installed on the water main. Note that the ideal water pressure is between 50 and 60 PSI

You want to make sure that the thermostat is not set too high. If the thermostat is set to high or if it’s faulty, the T&P valve will discharge to relieve the pressure inside the tank. Remember for a standard water heater the temperature should be set at 120 degrees Fahrenheit. You could try flushing the T&P valve to make sure it didn’t become filled by sediment.

Ways to Save on Your Water Heating Bill

Heating a home is expensive, but so is heating water. If you’ve already made a big effort to reduce your home’s heating costs and your utility bills are still higher than you’d like them to be, your hot water heater could be the culprit. According to Energy.gov, heating water accounts for around 18 percent of your utility bill. That makes it the second-biggest energy expense in the home (behind heating and cooling), so tweaking your hot water heater set up and usage habits could lead to some pretty substantial savings.

Lower the Thermostat

Take a trip out to the garage or down to the basement to see what temperature your hot water heater is currently set at. If the thermostat is set above 120 degrees Fahrenheit, bump it back. You’ll save 3 to 5 percent for every ​10-degree reduction, and you’ll reduce your family’s risk of burns.​

Fix Leaky Faucets

Do you have a leaky faucet that you’ve been putting off fixing? Then consider this: a faucet with a slow leak (that’s 60 drips per minute) wastes 3,153 gallons of water per year. If that leak happens to be coming from the hot water tap, you’re not only paying for that wasted water but also the energy it took to heat it. Do you want to see how much your leaky faucet is costing you? The American Water Works Association has a drip calculator you can use to find out.

Go Low-Flow

Putting off a bathroom update is one thing, but don’t put off replacing old plumbing fixtures. If your showerheads and faucets were manufactured before 1992, replace them with low-flow models. Modern showerheads use half as much water as older showerheads.

Find Ways to Use Less Hot Water

Try to be more mindful of your hot water use. Take shorter showers, wash laundry in cold water, and only run the dishwasher when it’s full. Examine your daily routine, and look for opportunities to scale back on your hot water usage.

Domestic water heating

Domestic water heating is the process of warming water for personal use, and it can consume a large amount of energy. In homes, water heating can consume 15-25 percent of energy used in a home depending on the house type, number of inhabitants, and the lifestyle of those who live there. It’s important to note that water heating is often more than all of the electrical needs of the household, see graph below.

use – on average – 75 liters of hot water each day for dish washing, clothes washing, cleaning, and personal hygiene. This water volume is fairly high, and heating it can result in high energy bills

The energy source for water heaters tends to be the same as what people use for space heating, although this is not always true. Possible energy sources include electricity, natural gas, propane, and oil

Each source has its own benefits and drawbacks. For example, electric heaters require no venting but cannot operate during a power failure and use a lot more primary energy than natural gas. Natural gas fueled heaters require adequate airflow and ventilation but heat up more quickly and use less primary energy. Propane has similar benefits to natural gas, but the fuel is more expensive and requires scheduled delivery.

Costs can be reduced by choosing a more energy efficient water heater, reducing the amount of hot water used, or installing a drain water heat recovery device to reduce the heating load. These devices are simply pipes that take the heat from the used warm water flowing down the drains and transfers it to preheat water entering the hot water tank

Some Useful Tips For Hiding Water Heater In your Home

Water heaters without any doubt are a must as far as our homes are concerned. They provide hot and pure water for various uses during the cruel winter months. However, there are a few things which must be kept in mind when installing a hide water heater. They could become a big eye sore and could spoil the overall aesthetics of your home. There is no point spending hundreds or even a few thousand dollars on your best tankless water heater if they become an eyesore for the home.

However, it is possible to find out ways and means by which you can conceal water heater and prevent it from being seen by the naked eye. But this has to be done carefully and without the disturbing the efficiency and functionality of these water heaters. Here are a few important points which if kept in mind could help in more ways than one.

Getting The Basics Right

It is important for you to get the basics right when it comes to hiding your water heater. You must have a permanent place for the same so that you can plan ahead and come out with the right plan for hiding it or concealing it. Before buying a water heater, you must ask some basic questions.

This could include the size of the water heater, the capacity it is supposed to hold, the power connections which are required for it and much more. This will help you to come out with the right plan for keeping the water heater hidden from the naked eye without disturbing the efficiency or defeating the purpose for which it is being used. You can consider using a hybrid water heater.

Using A Cloth Or A Pegboard Screen

If you look around you could come out with a number of options for hiding the water heater. In many cases you also could have a water softener which also could become unseemly and ugly. Hence your plan for concealing the water heater should be foolproof, practical and workable from the long term perspective.

CORRECT COMMERCIAL WATER HEATER SIZING: IT’S NO GUESSING GAME

When you’re in the market for a new or replacement water heater for your restaurant, hotel or apartment property, correct sizing is crucial to the success of your business. With so many commercial water heater options out there, here’s what you need to know to get it right.

Depending on how much hot water you need to run your business, there may be multiple commercial water heater tank sizes to meet your needs. With so many options available, how do you know what type and size water heater to choose? We can help point you in the right direction.

What You Need: A steady supply of hot water, when and where you need it–so your restaurant, hotel, apartment or craft brewery business keeps running smoothly.

The Bottom Line: Size too small and you won’t have enough hot water to run your business, especially during peak operating times. But size too large and you’ll end up spending excess money in both upfront capital and long-term operating costs. Whether you run a restaurant, hotel, apartment complex, senior living facility, salon or fitness center—any business that depends on hot water needs the right water heater sizing and setup.

Our Best Advice: Only work with experienced and knowledgeable commercial water heater professionals: you’ll not only keep your customers, you’ll also save money across the board.

Find Out How To Troubleshoot Basic Garbage Disposal Problems

How To: Clean a Garbage Disposal

If your sink smells like the dumpster behind a restaurant, take ten minutes to clean out your garbage disposal with these freshening tips.

Consider the environment within the average in-sink garbage disposal: It’s cool, dark, and moist, and there’s a near constant influx of food that gets shredded and scattered about. No wonder it gets smelly from time to time! To clean a garbage disposal and eliminate the odor-causing bacteria, follow these instructions.

STEP 1
There are two cardinal rules when it comes to cleaning a garbage disposal. The first is always to disconnect the power to the appliance before working on it. The easiest way to cut its power is simply by unplugging it. Normally, it’s plugged in to the wall under the sink. If you can’t locate the outlet, go to the electrical panel in your house and cut electricity to the circuit on which the garbage disposal is powered. To confirm that the power is off, try turning on the garbage disposal.

Next, point a flashlight down the drain to identify objects that may be lodged in, or wound around, the impellers that macerate the solids sent through the disposal. Look for such things as bottle caps, aluminum can pull-tabs, or vegetable fibers. If you find any, remove these items with needle-nose pliers or tongs. Yes, the second rule of cleaning a garbage disposal is never to stick your hand into the chamber.

STEP 2
Drop about a dozen ice cubes into the garbage disposal, followed by a half-cup of rock salt. Restore power to the disposal, so that you can turn on the mechanism while running water down the drain. Keep it on for about a minute, until all the built-up grime and gunk has fallen away from the disposal blades. Check the drain with a flashlight again. If the blades are clean, go and shut the power back off.

STEP 3
Pour a cup of vinegar and a half-cup of baking soda into the disposal. Let the combination fizz for about 15 minutes. In the process, the acidity of the solution kills bacteria, including salmonella and E. coli. Stick with the natural cleaners here; no toxic chemical should be used. Just as bacteria can come flying out of the disposal, compromising the sanitation of your kitchen sink, so too could a chemical.

STEP 4
While the vinegar and baking soda are busy fizzing inside the disposal, combine the two again—this time outside the appliance, on the counter—to create a thick paste. Put some of that paste on an old toothbrush, and use it to scrub down the top and bottom surfaces of the rubber flaps along the neck of the disposal. Those flaps are likely to be as bacteria-ridden as any other component. So while you’re at it, think about giving a good scrubbing to the rubber parts on your sink stopper, too, if there are any.

STEP 5
Now’s the time to engineer one final flush of the garbage disposal. First, plug the drain opening. Second, run the water in the sink until its basin is about three-quarters full. Add a teaspoon of dish soap, then finally remove the drain plug, letting the water drain out all while the disposal runs.

If you use your disposal daily, it’s a good idea to follow these steps once a week to clean it:

Step 1: With the disposal and faucet turned off, put six ice cubes in the chamber followed by 1 tablespoon of baking soda, three thin lemon slices, and 1 teaspoon of bleach. Top it all off with six more ice cubes.

Step 2: Turn the disposal on without running water until you hear the grinding stop.

Step 3: With the motor still running, flush with cold water for 30 seconds.

Thrifty Garbage Disposal Cleaning Tips

Did you know that your home’s garbage disposal needs to be cleaned regularly? During use, food particles and residue can be left behind and cause the unit to have an unpleasant odor.

The good news is that you don’t have to buy special, expensive products to do the job. Your disposal can be effectively cleaned with common items that you probably already have in your kitchen.  Learn some of the best ways to clean your garbage disposal with these 8 simple cleaning solutions.

1. Ice cubes 

One of the best disposal cleaning methods is with ice cubes from your freezer. Simply put a few handfuls of ice into the unit, then turn it on and run some cold water while the cubes grind. You’ll definitely hear the cubes working!

2. Ice and rock salt

You can also add a cup or so of rock salt to the ice cubes for some extra scrubbing power. Remember to run cold water when you turn the disposal on.

3. Baking soda and vinegar

A simple mixture of baking soda and vinegar is also a good dgarbage disposal cleaning method. Sprinkle about a half-cup of baking soda into the disposal, followed by a cup of white or apple cider vinegar. Let the mixture bubble up and sit for five to ten minutes, then turn on the disposal and run water to distribute the mixture throughout the unit.

4. Citrus

Any type of citrus peel is a good disposal deodorizer. Lime, lemon, orange, tangerine, and grapefruit peels will all help refresh your sink and system. Be sure to cut the peels into small enough pieces for the unit to handle, then turn on the unit and run water while the peels grind.

5. Borax

You can also sprinkle a few tablespoons of borax into the disposal, followed by running water.

Tips for Deodorizing a Garbage Disposal

If the disposal is really smelly, or you have tried other cleaners and still get a foul odor, you can use a diluted bleach solution of two parts warm water and one part bleach. Don’t use more than 1/3 cup of bleach, and wear gloves when pouring into the drain. After pouring the bleach solution into the drain, run warm (not hot) water down the drain for several seconds.

Using citrus peels is another popular way to freshen up a smelly garbage disposal. The citrus oils in the peels certainly add some fragrance to the air, but the fact is, the peels do little to clean the disposal, and they do nothing to get rid of those slimy areas (which you’ve hopefully already cleaned with a sponge).

To give your disposal a little spritz, grind a small handful of citrus peels (cut into small pieces) in the disposal with cool water. If desired, you can also add a few ice cubes. The citrus oil can give the disposal a pleasant smell that lasts a little while. Keep in mind that this freshening method works best on a relatively clean disposal.

Ways to Clean a Smelly Garbage Disposal

The convenience of a garbage disposal is undeniable, as it simplifies a lot of our kitchen cleanups. However, frequent use of it can lead to unpleasant odors. If you have noticed a less than pleasant scent emerging from your garbage disposal, know that this is not permanent. Ridding your garbage disposal of a smell is not a laborious task.

In fact, you probably already have all of the ingredients to do the job. Here are nine tips on how to clean garbage disposal, and get rid of those lingering smells immediately.

1. Clean the Visible Portion of the Disposal

Slather a generous amount of dishwashing soap onto a dish wand or scrub brush. Scrub the visible part of the garbage disposal. Be particularly aware of the joint where the disposal rim meets the sink basin because small food particles and debris have a tendency to get trapped there. Even mold can grow in this area.

2. Soak the Housing

It is always advisable to run the kitchen faucet when you operate the garbage disposal. This helps your disposal get rid of all of the bits of food trapped in the housing.

If you notice that your appliance smells bad, it may be time to give the housing a thorough soak. Stop the sink drain, fill the basin about halfway with water and then add a bit of dish soap or vinegar. Next, unplug the drain while activating the garbage disposal. This propels the soapy water through the housing, rinsing off its hidden nooks and crannies.

3. Dislodge Slimy Residue

Kosher salt is an effective abrasive cleaner that can adequately dislodge slimy residue. First, pour a large cup of ice cubes into the garbage disposal, switch it on while adding a half-cup of the salt. The ice and salt combination should grind away what remains of the odor-causing residue. This is yet another quick fix to a dirty drain using simple items that you already have in your freezer and pantry.
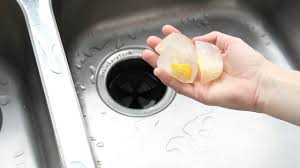
4. Citrus

Citrus fruits can help your drain stay clean as well as act as a deodorizer. If you have an extra lemon, lime, orange or grapefruit lying around, try grinding a few peels — or even the entire fruit — to imbue the kitchen with a fresh citrus scent. Not only will this help your kitchen smell great, but the rough peels help to clean the blades and the disposal wall. The citrus oils do a fantastic job of keeping your garbage disposal fresh.

5. Routine Flushing

Don’t wait for your disposal to start smelling bad before you act. Garbage disposals require active and preventative care.

Turn on the garbage disposal and run a thick stream of hot water through it for at least one minute. This should be long enough to push particles through the pipes in your house. This is an ideal method for reducing and removing odor, as it doesn’t require you to purchase any extra ingredients. This is a tip that you should do after each time that you run the machine.

The Things You Need To Know About Undermount Kitchen Sink

Information About Kitchen Sinks

What Are Kitchen Sinks Made Of?

When the time comes to replace or install a new kitchen sink, many things must be considered: style, size, color, durability, and of course, price. The goal for most people is to manage that fine line between looks and cost.

The stuff the sink is made of is extremely important. If you don’t understand the different materials, you might finger through a hundred sites, only to end up unknowingly choosing the wrong sink for your needs and taste.

Even though high-end sinks are beautiful and stunning to look at, they come with beautifully stunning price tags as well! So let’s take a look at what we can find to fit your needs, style and most importantly your kitchen project budget.

You will find an overview for each type of material used to manufacture sinks. Each will tell you what problems the sink material may bring as well as the good reasons for choosing each sink type. And a very in-depth look at everyone’s favorite sink material, stainless steel!

TYPES OF KITCHEN SINKS

Whether you’re looking to add the finishing touches on your kitchen remodel or have picked up a newfound love for cooking and need a more capable workspace, there are many reasons to update your sink.

We have compiled a list of types of kitchen sinks ranging between style and material. Each type contains tips on best uses, pros and cons and counter fitting points. Once you’ve narrowed down to the sink that will best fit your needs, check out our extensive selection of kitchen sinks to find one that suits your kitchen.

FARMHOUSE SINK

A farmhouse style sink, also known as an apron sink, extends over the edge of your counter. This type of sink is most commonly used in a traditional or rustic farmhouse style kitchen and can be designed with a single bowl or double bowl. These sinks are gaining popularity with the resurgence of rustic and farmhouse interior design. They typically come as fireclay or cast iron and are incredibly durable and easy to clean because of their nonporous material. Farmhouse sinks have a deep basin perfect for big families, lots of dishes and cleanup. They can be pricey and are more difficult to install because you have to cut out a large portion of your counter.

UNDERMOUNT SINK

An undermount sink is installed directly under the counter, creating a seamless look from countertop to sink. This type of sink is versatile and works with most kitchen layouts. Not only do these sinks look sleek, but they also make for easy clean up because debris can be pushed straight into the sink without catching on a lip or rim. It’s worth considering the weight of the sink that you choose since it is typically installed with glue which attaches to the underside of the counter and the sink. Most fireclay or cast iron sinks will not work with this installation method because of their heaviness.

STAINLESS STEEL SINK

Stainless steel sinks are light and easy to install, making them a functional and popular option. Stainless steel sinks are categorized by sheeting thickness, or gauge. A thicker gauge means the sink will typically be heavier and cheaper, while a thinner gauge will mean the sink is lighter and often more expensive. Stainless steel sinks tend to be noisier than other sink materials and they can dent, but they offer great heat and stain resistance.

BAR SINK

Bar sinks are installed in a home wet bar and are generally smaller and more shallow than your average kitchen sink, making them a secondary option. They are typically a single bowl design used for prep work, drink-making and convenient cleanup. If you have a large family or group of friends, a bar sink is great for entertaining in your home bar, patio or terrace.

CORNER SINK

Corner sinks are double-basin sinks installed on a corner of your counter. The two basins are set apart from each other, in a catty-corner manner. This is a relatively unique design that can be useful if you are looking to maximize your counter space. Corner sinks can be expensive and difficult to install. Since most counters are seamed at the corner, custom cuts in the counter will add to the total cost of installing this type of sink.

Porcelain vs Black Kitchen Sinks

Pros of Porcelain Sinks

It costs less to install a porcelain kitchen sink than a black sink. Porcelain material is widely available and has long been used for sink installations. The price range for porcelain sinks accommodates many people. This makes it an affordable option when it comes to kitchen sinks. Porcelain is generally a light-colored material. The light shades make it a good choice for those who prefer lots of light in the kitchen. The light shades of the kitchen sink enhance the natural lighting aspect in the kitchen. Dirt shows easily on porcelain so it’ll never be too hard to know when you need to clean your sink. This will help you achieve a clean looking kitchen all the time.

Pros of Black Kitchen Sinks

Black is a sleek and trendy choice for the modern kitchen sink. If your kitchen appliances and countertops are black, a black sink blends perfectly with the décor. Black will give your kitchen a uniquely attractive appearance. Black sinks will also retain their appearance far longer than porcelain sinks. Black sinks are low maintenance. Dirt doesn’t show easily which makes it easier to have your kitchen looking good. Stains don’t form on black sinks and they’re also easier to clean. Porcelain kitchen sinks require a lot more maintenance. Black kitchen sinks rate highly for heavy-duty use. Black sinks are a good choice for those with young children in the house.

Single Bowl  vs  Double Bowl Sink

Saving Counter Space

If you use every inch of available counter space in your kitchen for storage, food prep, and decor, then double bowl sinks are useful with the second bowl. Using a double bowl sink with two large bowls gives you the option of placing a drying rack in the sink rather than on the counter. So, you can wash dishes in one bowl and dry them in the other without needing counter space.

Some single bowl sinks have a built-in 1 drying rack on one side, but this reduces the washing space. The size of the sink is always dictated by the sink base cabinet, so when you have limited counter space, a double bowl sink may provide the storage and drying area needed. Using a single bowl sink in a small kitchen also maximizes counter space, providing more prep room and counter storage than with a larger sink.

Installation

As far as the installation of the sink is concerned, there is little difference between a single and double bowl. Both sinks are held in place with epoxy 2 and sink clips. A large C-clamp will hold the sink to the counter while the epoxy 2 dries. The difference in the installation is when it is time to connect the plumbing.

Because a single bowl sink has only one drain, the installation is faster, easier, and cheaper. Placement of the faucet is also easier because there is only one bowl requiring water.

Double bowl sinks have two drains, which need to connect to one another before entering the final waste trap. One side of the sink may have a garbage disposal, while the other does not, which increases the difficulty. In addition, having a double bowl sink raises the question of where the faucet will be placed. If both sides of the sink will be used for washing, the faucet needs to be located so that it can fill both sides.

The Great Kitchen Sink Debate: Single or Double?

The kitchen is among the busiest rooms in any home, and especially so during the holidays. Are you thinking of how your kitchen can be redone to better accommodate next year’s holiday preparations? If the kitchen sink is one of your concerns, then you’re reading the right post!

Is a Double-Bowl Sink Worth the Space?

If you have an older home, it probably came with a double-bowl kitchen sink. This trend made its rounds at a time when dishwashers were not yet standard in the average American home. The primary purpose of double-bowl sinks was to make dishwashing easier: one bowl for soapy water, the other bowl with clean water for rinsing.

Nowadays, the double-bowl sink is rarely used for dishwashing. However, this type of kitchen sink does more than make dishwashing easier. Some of the benefits of a double-bowl sink are:

  • It’s ideal for washing large pans and other items that you don’t want to run through the dishwasher.
  • It helps keep things organized. For instance, you can put dirty dishes in one bowl while you use the other for food preparation.
  • It makes garbage disposal easier too. You can use the garbage disposal on one side even if the other bowl is full of water or dirty dishes.

Is a Single-Bowl Sink Enough for Your Needs?

Today, single-bowl sinks are dominating the home kitchen designs arena. Single-bowl sinks have one deep basin without any divider. They offer a number of benefits, including:

  • They provide more space for washing bigger kitchen items.
  • They do not take as much counter space as double-bowl sinks.
  • They are ideal for smaller kitchens.

Let DreamMaker Bath & Kitchen Help You Choose

Choosing between a single- or double-bowl sink will largely depend on your needs. Do you need more counter space? A single-bowl sink could prove to be a good choice. Do you like the ability to separate dirty dishes while rinsing produce? A double-bowl sink can serve you wel

Proper Maintenance Of Your Garbage Disposal

Tips for Choosing a Garbage Disposal

There’s no doubt that it’s very useful to have a garbage disposal in your kitchen. However, you need to be sure that you choose the right garbage disposal for your own specific requirements. When you look for a garbage disposal, you will find that there are many models available. Finding the right garbage disposal is quite easy once you know a little bit about them.

Regulations

The first thing to determine is whether local regulations allow you to actually have a garbage disposal. If you’re simply replacing an old model, this is unimportant. However, if you’re putting in a brand new unit where you haven’t had a garbage disposal before, remember to check beforehand. Not all areas allow for the installation of garbage disposals because of the increased strain they place on sewer lines.

Plumbing

Will your plumbing handle a garbage disposal? Not all existing plumbing will so take the time to check first. It’s also important to check your fixtures to discover what types of garbage disposal will be compatible with your current plumbing and sewer system.

Motor Size

Many small garbage disposals come with a motor that’s just 1/3 horsepower. While that may be fine if you’re a single person in an apartment, you need something more powerful for a family home where the garbage disposal will be used more. You should ideally look for a unit that has a 1/2 horsepower motor. With a big house and plenty of people, you might even want a 1 horsepower motor on your garbage disposal.

Stainless Steel

Look for a garbage disposal with stainless steel blades. These are harder and sharper and will not only last longer, but will grind up the food more finely so you won’t have to deal with clogs in the pipes. Cheaper units will use far less stainless steel in their construction and are likely to wear out sooner. Bear this in mind as you check out units.

Best Garbage Disposals

Garbage disposals are a convenient way to get rid of food waste in the kitchen. But whether you’re seeking your first-ever disposal unit or looking to replace an old one, you’re going to want the best of the best. That’s where we can help.

Why Should You Buy a Garbage Disposal?

Garbage disposals are just plain handy when it comes to handling, well, garbage. This includes food scraps, smelly leftovers you forgot in the back of the fridge, or even flowers kept a little past their prime. Sure, a good kitchen trash can serves a similar function just effective, but people are crazy about their disposals for other reasons.

Are Garbage Disposals Good for the Environment?

The environmental impact of garbage disposals has long been the subject of debate. Over the years, researchers have struggled to provide a definitive answer as to whether a grinder or a landfill is the more eco-friendly option. However, recent research has brought forth evidence in favor of garbage disposals.

How to Choose the Best Garbage Disposal

What makes an in-sink garbage disposal system good or bad? There are a few basic aspects that consumers should consider prior to purchase.

How Noisy Are Garbage Disposals?

If you’re sensitive to noise, you should know that all garbage disposals produce it but some are louder offenders than others. When choosing a garbage disposal, you’ll want to carefully consider the noise levels that work best for you.

Tips for Picking the Right Garbage Disposal

Disposers can last as long as 10 to 15 years, and it can be overwhelming to shop for a replacement with so many changes over time. Most homeowners are familiar with the two basic disposer types – continuous feed vs. batch feed. (Continuous feed grinds while food is continuously fed into the disposer, and batch feed grinds food in batches.) But there are several technological differences that affect functionality, performance and durability.

Motor Type 

There are two types of motors: induction motors and permanent magnet motors. Most disposers use an induction motor, which is similar to motors used in large household appliances – such as washers, dryers and furnaces. These motors produce less noise and offer a long, reliable motor life. A permanent magnet motor is a lightweight, variable-speed motor that is similar to motors found in smaller appliances, such as power tools, blenders and hair dryers. While permanent magnet motors generally run at a higher RPM, they will run fastest with smaller grind loads.

Horsepower

Disposer motors can range from 1/3 horsepower to more than one horsepower. Higher-horsepower disposers are typically capable of grinding heavier loads easier, which prolongs motor life. Consider higher-horsepower models for larger families or frequent cooking.

Component Materials

Three types of material are most commonly used with grind chambers and grind components: plastic, stainless steel and galvanized steel. Most disposers are constructed with thermoplastic polymer grind chambers, which help to resist rust and corrosion. However, stainless steel adds superior corrosion resistance that helps prolong disposer life. Galvanized steel is a durable material, but it can rust or corrode over time.

Noise Levels

Many homeowners are accustomed to loud disposers, but products with advanced sound technology can reduce noise levels by 30 to 60 percent. Look for disposers that have sound insulation and include noise-reduction features like noise-reducing sink baffles; anti-vibration sink mounts; and anti-vibration tail pipes.

Garbage Disposal Buying Guide

A garbage disposal (also called a disposer) is a great asset to any commercial kitchen – these machines help you cut labor costs by removing even tough waste fast, and they also help you save on waste collection bills. Choosing the best garbage disposal for your business can seem like a daunting task at first

Pros and Cons of Owning a Garbage Disposal

Garbage disposals offer a number of benefits for commercial applications, but it’s very important to educate yourself before you buy and understand what these machines do and what they don’t do.

Benefits of a Garbage Disposal

Decreased costs for solid waste removal and garbage bags.

Your drain is less likely to clog, which means fewer costly plumbing bills.

Less waste sitting around means fewer bad odors, which also makes your facility less attractive to pests like rodents and insects.

Convenience – it’s much easier to get rid of food scraps in a disposal than to scrape them into the trash can.

Less waste in the trash can means fewer trips to the dumpster for your staff.

Disadvantages of a Garbage Disposal

Increased costs for maintenance and water / electric use.

Pro installation is recommended for optimal safety and warranty compliance.

If sound travels easily from your sink to the dining area a disposal could disrupt the ambiance.

Some areas may restrict use – check with your municipality for applicable regulations.

Some items cannot be put in a disposal, so correct training for staff is important

How Will a Garbage Disposal Affect My Utility Bills?

Water – In general you can expect smaller units (2 hp and less) to utilize around 5 gpm, and larger units (3 hp and over) to utilize around 8 gpm. Exact usage figures will vary, so check the literature for your specific model number.

Best Garbage Disposals

If you are looking for the best overall, I recommend the Waste King L-8000 because it features a powerful 1 HP motor and an easy plug-in installation.

Disposals help to conveniently reduce the quantity of food scraps and leftovers sent to landfills and are an essential piece of equipment in any kitchen.

Operation

There are variations between how different models operate but the way in which they process scraps is essentially the same. Items to be discarded are fed through the rubber drain cover called the splashguard, which prevents food from jumping back out.

Jams

Jams can happen for a variety of reasons such as putting in too much food at once or accidentally dropping a knife in the opening. To reduce the risk of damage, most units feature an overload protector switch that is tripped in the event of a serious jam. The obstruction then needs to be removed or cleared then switch on the unit can be turned back on. 

Waste King L-8000 1 HP Garbage Disposal

The Waste King L-8000 1 HP Garbage Disposal offers easy plug-in installation so there is no need for electrical wiring or a separate power cord.