Curved Metal Roofing

A Guide to Selecting the Right Metal Roof Panel

With the great variety on the market, one of the main questions we, as metal roof panel manufacturers, get from customers is “How do I select the right panel for my project?” The answer can generally be found by examining a number of criteria, including the properties of the roof, the region and climate, geometry, slope, warranty type…among other key factors.

Slope— Slope is the first consideration as just this one aspect will eliminate certain panels, making it easier to narrow down options right from the start. The two types of roof slopes are low slope and steep slope.

A low-slope roof, commonly found in commercial applications, is one whose slope is less than 3:12. The benefits include a simpler geometry that is often much less expensive to construct, and the requirement of fewer materials than a steep slope, thereby reducing material costs.

A steep slope roof, more common in residential construction, is one whose slope is greater than 3:12. Steeper slopes are ideal for areas that have higher snow loads and will also prevent the possibility of ponding water on the roof. Since the roof is a visible part of the structure, choosing a metal roof for residential construction often skews more toward aesthetic considerations.

Location/Climate— The location and climate of the project is a factor, specifically when looking at certifications/regulatory product approvals, which will limit the panels you can you use within specific regions. This is most relevant to Dade County, the state of Florida, and the Texas Coast, as well as certain snow regions.

How to Choose a Metal Roof

Metal can be formed into a variety of roofing materials, including these stone-coated steel shingles from Boral. Metal’s market share is on the rise, now accounting for about 14% of the total residential re-roofing market.

Metal roofing has a long history in the U.S. but until 20 years ago it was a bit player in residential construction with just a 3.6% share of the reroofing market. That number has roughly quadrupled since then, according to an industry trade group, as metal claims an increasingly larger slice of the pie

What happened? Product offerings are more extensive than the simple corrugated panels that have long been used on barns and sheds. Metal roofing is available in a range of styles — from several kinds of standing seam to a variety of stamped metal shingles that look like slate, clay tile, and even asphalt. Paint and stone coatings are more sophisticated and more durable, giving roofing a very long service life while appealing to homeowners with a variety of aesthetic preferences.

The industry also is working harder to win over consumers who once thought that metal roofing was too hot, too heavy, noisy, or prone to rust, says Dick Bus, president of ATAS International and head of the Metal Roofing Alliance. “Those myths are gone, and people want to reroof with something that has some permanence to it,” he said. “Metal roofing that’s properly installed can last upwards of 50 to 60 years or more.”

Metal roofing may never catch up to asphalt in the residential arena simply because of cost. Light gauge, through-fastened panels might be competitive with asphalt on a simple roof shape, but the industry acknowledges that a standing seam or metal shingle roof can be two or three times the initial cost of asphalt. Still, manufacturers think they can continue expanding on the strength of other attributes: long-term performance, recyclability, high fire resistance, and low maintenance.

CHOOSING A METAL ROOF – FIVE MISTAKES YOU MUST AVOID

Unless you’re involved in the roofing or construction business or you’re one of the few outside the industry that have purchased more than one metal roof, it’s likely that your initial investigation into the topic leaves you bewildered at the great variety of choices. We routinely get emails and contact forms with questions in the comment section asking, “How much for a metal roof?” Unfortunately, that’s a little like asking, “How much for a new car?” The answer to both variable – what are you looking for? We supply metal roofing that costs anywhere from $1 a square foot to over $20 – and in every case it’s fair to say, “You get what you pay for!” The reason for the tremendous range is that there literally hundreds of choices that are all “metal roofs.”

Assume all metal roofs are the same.

They are NOT. They vary by metal type, thickness of metal, finish, and profile. Metal roofs come in more shapes, sizes, types, finishes, thicknesses, and those differences can affect performance, lifespan, durability and price

Assume all roofers know about metal roofing. 

This is simply not true. While most roofers and roof contractors claim to be able to install ANY roof – including metal – the fact of the matter is that most of them don’t have much experience with metal roofing systems. Since composition shingles are the most common roofing material by a wide margin (no coincidence they’re the cheapest by a wide margin!), that is the product with which most roofers are experienced. I can tell you from many years of first-hand experience with the finished jobs that there is a GREAT difference between the finished job of an experienced and properly trained metal roof specialist and that of the average “roofer.” If you’re going to hire someone to install your carefully selected roof, make every effort to make certain that they have years of sheet metal practical experience. You’ll be sorry if you don’t.

Buy the wrong metal roof for your application. 

As good as metal roofs can be, they must be matched to the job. For example, while metal roofs can be excellent in snow country, the wrong metal roof can “hook” moving snow and ice and cause damage, while a properly chosen and executed metal roof will shed snow and ice without damage. Similarly, there are many metal roof materials that work well in locations near salt water, but choosing the wrong base metal and premature orrosion can result, dramatically reducing the life span of the roof.

Buy a metal roof based on price alone.

Just as you wouldn’t buy a car (or house or television or refrigerator, etc., etc.) on price

alone, the same applies to metal roofing materials. There’s a reason one metal roof is cheaper than another, and it’s usually because the material is thinner, the metal is cheaper (and less corrosion resistant), the finish is poor or the profile is weak. To ensure you get good value for the money you’re spending, make sure you’re spending enough to get a metal roof that will do the job you’re expecting.

Key Considerations for Selecting the Right Metal Roof

Selecting the right metal roof for your home can be a challenge. Once you’ve decided on metal for protecting your home, there are still many decisions ahead about which products will best meet the demands of our local climate, look great, and be the easiest to maintain

Industry-leading PVDF coating technology. Many people choose metal roofs in order to avoid the streaking and staining that attacks granulated-surface shingles. Kynar 500® and Hylar 5000® PVDF resin-based finishes offer the best resistance to streaking and staining. These finishes are available in many colors and even multi-hued shades, offering the best combination of durability and fade resistance.

“Self-Cleaning” Valleys. Let’s face it, a lot of debris ends up on your roof; tree leaves, pine needles, seed pods, ice, and snow. They all travel down your roof and end up in any valleys the roof may have. Many metal roofs have “closed” valley systems with hidden waterways to channel water off of the roof. These hidden waterways, however, will clog up with debris and then the water path is blocked and bad things (leaks!) happen. “Self-Cleaning” valleys carry the water and debris on top of the roof and can’t clog.

Premium Certified Products. The Metal Construction Association has developed a Quality Certification Program which recognizes products and manufacturers that meet high levels of standards in terms of raw materials and processes. We strongly encourage products and manufacturers that are part of this program. Kassel and Irons products all meet this certification.

Special Flashings. Many roofs have areas which require special care, including special flashings. Unlike temporary roofing solutions, you can’t just depend upon sealants for metal roofing. If your roof has dead valleys, skylights, chimneys, flared gables, or other unusual things, make sure that you understand exactly how these will be handled by your contractor.

Key Considerations for Choosing a Metal Roofing Supplier

As a manufacturer of specialty residential metal roofing, we’d love to have the opportunity to work hard for your confidence. However, whether you consider us or not, we want to share with you the key things to consider when choosing a metal roofing supplier

Types and Styles of Metal Roofing

As you research metal roofing suppliers, it will not be unusual to find that different suppliers focus on providing different types of metal roofing. A common distinction is whether they focus on vertical seam metal roofing or modular panel metal roofs that look like wood shakes, slate, tile, or other materials. However, amongst the vertical seam products, you will find further differentiation with manufacturers producing exposed fastener products, nail hem panels, true clip-fastened standing seam panels, and mechanically-seamed standing seam panels. Amongst the modular panel manufacturers, you will find companies specializing in painted products, usually using the industry-leading PVDF technology, and stone-coated products. As you start to zero in on the style of metal roof that best meets your needs and the architectural design of your home, we suggest choosing a supplier and manufacturer that has significant experience with your preferred style of metal roofing.

Taking into account the “ship-to” location of your new roof is important. Here’s why:

If the choice for your home is a vertical seam roof, the panels will likely be ordered in custom lengths sized from the bottom of the roof to the peak. On many homes, these panels can be from 15 – 30’ in length or even longer. Shipping these panels over long distances can be quite costly. While shipping a long distance may be necessary for Premium Grade panels, lower grade panels are produced regionally and may only need to be shipped 50 miles or less depending on where you live. The required shipping distance will impact your cost as well as the embedded energy in your roof’s environmental footprint.

Experience

The experience level of your metal roofing supplier is very important. There are things that companies learn to do better over the years, especially in the areas of flashing design and installation details, that impact a roof’s long-term performance. Additionally, your metal roofing manufacturer will provide the product warranty for your roof and you will want to seek a manufacturer with proven history and stability that indicates their ability to support any future warranty claims. You will also find that the more experienced and stable manufacturers will usually play industry leadership roles with highly educational websites and active participation in industry trade associations such as the Metal Construction Association and the Metal Roofing Alliance.

Raw Materials

Be certain to confirm the quality and grade of metals and coatings used by the manufacturers and suppliers you are considering. Many manufacturers are using non-North American metals for their roofing systems as these metals are less expensive. If buying a roof made from USA-produced raw materials is important to you, you can seek out companies that produce their products only from domestic raw materials. An additional way to determine raw material quality is by seeking out suppliers that meet or exceed Metal Construction Association’s Certified Metal Roofing program requirements.

How To Install Ceiling Fan

How to Buy a Ceiling Fan

Determine Ceiling Fan Location – Indoor or Outdoor Ceiling Fan?

There are three types of ceiling fans: indoor, damp-listed, and wet-listed ceiling fans. Here’s how to determine which one you need based on where it will be installed

Indoor Ceiling Fans

Do you need a ceiling fan for your living room, kitchen, or bedroom? Then you’ll need an indoor ceiling fan. All ceiling fans can be used indoors, which means they might not be marked as indoor fans so you’re free to shop and browse the entire selection of ceiling fans.

Outdoor Ceiling Fans

Designed for outdoor use in spaces such as patios and porches, outdoor ceiling fans are weather-resistant fans that can withstand exposure to the elements.

Damp Listed Ceiling Fans

A damp-listed ceiling fan is recommended for outdoor areas that are covered but not directly exposed to water. Examples include covered porches and covered patios, since these areas are completely protected from water.

Wet Listed Ceiling Fans

If you have an outdoor area directly exposed to water, look for a wet-listed ceiling fan to avoid weather damage. Examples of outdoor areas that require wet-listed fans include uncovered gazebos, open-air patios, and open-air decks.

THE ULTIMATE GUIDE ON HOW TO CHOOSE THE RIGHT CEILING FAN

CHOOSE THE APPROPRIATE RATING FOR YOUR LOCATION

Is this fan going indoors or outdoors? There are 3 different ratings to consider:

Indoor Rated: Rated only for indoor use, cannot withstand moisture or direct water exposure.

Damp Rated: Rated for mild Outdoor use and indoor use; Can withstand heat and cool moisture, such as desert heat or cool mist or fog. CANNOT withstand direct rain or hose exposure.

Wet Rated: Rated for Outdoor use and can withstand Direct Water Exposure like Rain or cleaning with a hose; You can also use WET Rated fans for DAMP or INDOOR Locations, but not the other way around.

CHOOSE THE RIGHT BLADE SPAN

You want to choose the proportional blade span for the space. Below is a good starting point, keep in mind that if the room is very large, you may want to consider using two fans instead of one.

CHOOSING THE RIGHT DROP

Measure the height from the ceiling to the floor of where you plan on installing your fan. The chart below will give you a good reference guide as to which downrod you should choose. Keep in mind that some homeowners may choose a slightly different drop for preferred “visual” reasons.

CHOOSING THE RIGHT FINISH

There are 3 main finishes/colors for ceiling fan motors. Most fans will come in 3 different options that fall in the category of; silver, brown, and white

CHOOSING THE RIGHT CONTROL

There are 3 main types of controls; Pull chain, Remote Control, and Wall Control. In most cases, you can generally add a remote control or wall control to your fan, but hardly ever add a pull chain to one

Ceiling Fan Tips

From decorative styles to slimline designs that blend effortlessly into any interior. But with so much to choose from, it can be difficult to know which is the right fan for your room.

Save energy with fans

Ceiling fans provide a natural energy saving cooling solution. Most ceiling fans use only about as much power as a 60 watt light bulb which equates to less than 3 cents per hour to run.* Ceiling fans will save you money in utility bills in both the winter and summer months.

Outdoor areas

Fans located in outdoor areas should be protected from the elements, therefore are only recommended for outdoor rooms or alfresco areas. Outdoor fans must not be exposed to water under any circumstances and must have at least 2 walls of protection from wind

Ceiling Height

If you have ceilings above 3 metres, you may require an extension rod. All ceiling fans come with an optional extension rod, our standard size is 900mm but you can easily cut them to suit your requirements.

Recommended Installation Height

Any ceiling fan should be at least 2.1 metres from the floor to the blades of the fan and at least 300mm from the ceiling

How to choose the best ceiling fan

Ceiling fans are a great way to stay comfortable when the temperature rises. They can work in tandem with your air conditioning to circulate cool air, or as a cost-effective alternative. When choosing the best ceiling fan for your space, there are a few things you might want to consider.

What size ceiling fan

It might sound obvious but the basic rule is the larger the room, the bigger the fan required. For a small room (up to 20 square metres) fans with blades up to 122cm are ideal. For a bigger room, you’ll probably want to look for a fan with blades that are 130cm or more

Take control

Generally, there are two options when it comes to controlling your fan. Either a wall switch with a dial to vary the speed, or a remote control if access to the roof and wiring is an issue.

Three or four blade ceiling fans

Most fans have either three or four blades and are made of either plywood, metal or plastic. The number of blades has no effect on their ability to cool a room but timber and plastic blades do tend to be a little quieter than metal.

Finish and colour

Another factor worth considering is how your fan is going to look within a room, as they can become a dominant feature. This is not too much of an issue if it’s going to be installed in an outdoor area, but for indoor fans it’s worth thinking about how it will complement your colour scheme and décor.

Ceiling Fan Buying Guide

Choose the Right Ceiling Fan for Your Space

A ceiling fan’s primary purpose is to circulate air in a room. Air conditioners chill air, but ceiling fans push it around, which means they’re useful for both cooling and heating. In a bedroom, a ceiling fan encourages restful sleep without running the air conditioning. On an open or screened porch, a ceiling fan can create a refreshing retreat — just be sure it’s rated for damp or wet locations. Look for outdoor fans with weatherproof fan blades, too. Both types can handle moisture, but damp-rated fans shouldn’t come in contact with water. Wet-rated fans are suitable for coastal or rainy areas.

Ceiling Height

When selecting a new or a replacement ceiling fan, keep in mind the ceiling height. The ideal fan height from floor to fan blades is approximately 8 feet. Many fans have multiple mounting options, allowing them to work almost anywhere in the home. Measure the height of your ceiling to determine the mounting option that’ll work best for your space.

Mounting Options

Flush Mount: Made for rooms with low ceilings where a low profile is wanted or required. These ceiling fans are mounted flush to the ceiling, with no extra attachment.

Ceiling Fan Blades

The look of a ceiling fan’s blades are actually more of a design feature than a matter of efficiency or utility. The fan’s ability to move air is determined by the pitch of the blades, so pick the one you like the look of best. Many fans come with reversible blades so if you get tired of one finish, you can reverse them later. Talk about an effortless design update. The number of blades and blade shapes are also getting a makeover. Some fans have as many as nine blades, for a helicopter style; however, the traditional four- to five-blade ceiling fans remain classic

Ceiling Fan Direction in Summer and Winter

Change the ceiling fan direction to make it more comfortable year-round, and save energy and money by adjusting your thermostat. In the summer, set the fan blades to revolve in a counterclockwise direction as you look up at it to create a downward motion and a cooling effect. Doing this also raises the thermostat temperature, which will reduce your air conditioner’s workload.

Why Led Electrical Lighting Are The Way To Go

Tips for Choosing LED Bulbs for Your Home

LED (light emitting diode) lights use less energy, last longer, come in many different colors, and are now available in a variety of bulbs that can fit into the sockets already around your house. If you’ve been attracted by LED lighting before but haven’t switched yet, now’s the time. Here’s what you need to know about buying LEDs for your home.

LED Bulbs for Home: Learn Your Lumens

Because LED light bulbs don’t use much electricity (they use a small electrical charge to produce energy along the visible spectrum, thanks to highly specific, reactive compounds), you can’t really use watts to judge their brightness. Instead, look at lumens, a more direct measure of brightness. Around 800 lumens is equivalent to a 60-watt incandescent bulb, while 1600 lumens is about as bright as a 100-watt incandescent bulb

Understand Color Temperature

Manufactures use the Kelvin temperature scale to show the general shade of the “white” bulb—colors tend to fall between 2,700 and 6,500 Kelvin. A low Kelvin score means that bulbs are “warmer” and more yellow, like natural light, while a higher number means that light is “colder” and bluer. Pick the shade that fits the bulb’s purpose

LED Bulbs for Home: Watch for CRI

CRI stands for Color Rendering Index, a more direct way that manufacturers describe color accuracy for lights, with 100 being a perfect accuracy score. Not all manufacturers use CRI (many brands wouldn’t score well), but those that do tend to have high CRI scores in the 80s or 90s, a sign of quality LED lighting

LED Bulbs for Home: Make Sure Bulb Replacements Match Your Old Sockets

LED bulbs are made to fit into traditional sockets. However, remember to look at the sockets you want to switch to LED. Note their position and depth, and keep that in mind when shopping for LED replacement bulbs. Old or corroded sockets should be replaced

How to Choose the Best LED Light Bulb for Any Room in Your Home

Every room in your home is different.

You likely have heard that sunlight gives us energy, but did you know that light bulbs work in a similar way? Bulbs that emit blue light waves produce serotonin, which makes us focused, awake, and alert. Bulbs that don’t emit blue light waves allow for our brain to produce melatonin, which makes us relaxed, drowsy, and ready for a good nights sleep.

Lower temperature bulbs produce warm-whites, similar to a fire, while medium temperature bulbs produce neutral-whites, and higher temperature bulbs produce cool-whites or mimic daylight

It is also a common misconception that the brightness of a light bulb is measured in Watts. Watts actually measure energy usage, while Lumens measure brightness.

LED Lighting for Bedroom Use

In our bedrooms, most of us want the atmosphere to be relaxed, calm, and peaceful. Avoiding blue light waves in the bedroom will keep your circadian rhythm from confusing the light in your bedroom with the natural light outside. This allows your brain to produce the melatonin needed for a comfortable sleep. Are you a nighttime reader? If you have a bedside reading lamp or plan on buying one, soft blue or neutral tones are better for reading specific fixtures, since the cool-white color creates a high contrast with the page

LED Lighting for Home Office Use

When lighting a home office, we want to make sure that the lights are maximizing our ability to be productive in the space provided. Putting cool-white lights in the office that mimic daylight will increase serotonin production keeping you focused, alert, and energized. Make sure to choose a place that won’t create unwanted glares on your computer screen. You may also want to consider LED Desk Lamps which offer great task lighting and the ability to switch color temperature on demand.

things to consider before buying LED bulbs

The reasons why are compelling — they last much longer than incandescent bulbs, provide interesting features and can save you money on your electricity bill. Besides, many incandescent bulbs — like the 100-watt incandescent — are being phased out, so eventually you’ll need to make the switch anyway.

Forget what you know about incandescents — your watts are no good here.

When shopping for bulbs, you’re probably accustomed to looking for watts, an indication of how bright the bulb will be. The brightness of LEDs, however, is determined a little differently.

Contrary to common belief, wattage isn’t an indication of brightness, but a measurement of how much energy the bulb draws. For incandescents, there is an accepted correlation between the watts drawn and the brightness, but for LEDs, watts aren’t a great predictor of how bright the bulb will be. (The point, after all, is that they draw less energy.)

You can always count on incandescents providing a warm, yellowish hue. But LEDs come in a wide range of colors.

As shown off by the Philips Hue, LED bulbs are capable of displaying an impressive color range, from purple to red, to a spectrum of whites and yellows. For the home, however, you’re likely looking for something similar to the light that incandescents produce.

LED bulbs are like hybrid cars: cheaper to operate but pricey upfront.

When switching to LED bulbs, don’t expect to save buckets of cash. Instead, think of it as an investment. Luckily, competition has increased and LED bulbs have come down in price (like this $5 LED from Philips), but you should still expect to pay much more than an incandescent.

LED buying guide

You’ve got more lighting options than ever before, but that also means that the lighting aisle is a lot more complicated than it used to be. We’re here to help.

It’s been more than 10 years since Congress passed the Energy Independence and Security Act of 2007 (EISA). In doing so, they put the age of inefficient incandescent lighting on notice. The law mandated strict new energy standards designed to kick-start a new era of greener, longer-lasting, more cost-efficient light bulbs — and that meant kicking outdated, inefficient bulbs to the curb

In other words, the age of the LED is here, and you only need travel so far as your local lighting aisle to see the change. With all of the new options out there (not to mention the disappearance of some important old ones), finding the perfect bulb can seem pretty daunting. New lights that promise to last 20 years and save you hundreds of dollars might sound good in theory, but how do you know which one is the right one for you? How do you know the bulb you’re buying is going to be bright enough? What about color temperature? Color… rendering?

What kinds of bulbs are available?

We’ve all gotten to know incandescents quite well over the past 135 years or so, but times are changing. These days, you’ve got more options than ever before, and familiarizing yourself with them is the first step toward finding the right bulb

Light-emitting diodes, or LEDs, are the new rock stars of the bulb world. When an LED is switched on, electrons and electron holes come together (and don’t worry, I’m not completely sure I fully understand what a “hole” is in this context, either). At any rate, the result of this process is a release of energy in the form of photons — or light, to you and me.

For instance, a single 10-watt LED that puts out 800 lumens of light (lumens are units of brightness for a light source — more on that in just a bit) will add about $1.20 per year to your power bill if used for 3 hours a day at an average energy rate of 11 cents per kilowatt hour (kWh). Under those same parameters, a traditional 60-watt incandescent bulb that puts out the same 800 lumens will cost about $7.20 per year. That’s more than the cost of replacing it with a basic LED like the one described above. Multiply that by the total number of bulbs in your home, and you’re looking at the potential for some pretty significant long-term savings, especially if you live in area with above-average energy rates.

FACT SHEET: A CONSUMER’S GUIDE TO BUYING QUALITY LEDS

Light-emitting diode light bulbs and lighting fixtures are known as LEDs. LEDs can have varied designs with a range of looks for many different uses. From the outside, many look like old-fashioned light bulbs and are available to replace a wide range of inefficient halogen and incandescent lighting.

Quality LEDs are now in most cases the ‘best buy’ in terms of electricity costs to run, frequency of replacement and overall lifetime costs.

Not all LEDs are the same

Unlike Compact Fluorescent Lamps (CFLs), LEDs are currently not regulated for energy efficiency – or characteristics such as colour. This means you may experience greater variation in their performance.

Light output (Lumens)

The best way to identify a suitable LED lamp replacement for an existing lamp is to look for the amount of light the lamp produces (measured in lumens or lm). Package information that says that the light output was actually tested for this performance is a good sign of a quality product.

Unfortunately the information on the LED packaging is not always accurate. Sometimes the information stated on the package is about the light source within the bulb (the electronic LED chip), not the light produced by the whole LED bulb. Light sources tested under laboratory conditions will always have a higher light output than the LED bulb used in normal conditions. If you have questions about the specification you should ask the retailer or contact the manufacturer.

What You Need To Know About Vacation Rentals Cleaning Before You Go

Vacation Rental 101: Housekeeping

The number one cause of vacation rental guest complaints is cleanliness. When guests pay hundreds or thousands of dollars to stay in your home, they expect it to be immaculate. If it hasn’t been cleaned before their arrival, they’re understandably going to be upset.

WHAT MAKES A VACATION RENTAL CLEANING DIFFERENT

A vacation rental cleaning goes above and beyond what you’d expect from a typical house cleaning. Your housekeeper needs to be ready to provide a higher level of service, and handle tasks like

IF YOU’RE THINKING ABOUT DOING IT YOURSELF…

The first decision you need to make about cleaning your vacation rental is whether you’re going to do the work yourself or hire a service to handle it for you

Even if doing it yourself seems like an attractive option, ask yourself an honest question: Can I commit to deep-cleaning the entire property more than once a week?

In high season, you might have “quick turns” where a guest checks out at 10 a.m. and the next guest checks in at 4 p.m. In that window, you’ll need to provide a thorough cleaning. If you can’t guarantee you’ll be ready and willing to do that, you need to hire someone who can.

IF YOU’RE THINKING ABOUT HIRING A CLEANING SERVICE

Working with a cleaning service is a great alternative. If you don’t want to handle the cleaning yourself or you don’t live near your rental property, it’s helpful to have a trusted housekeeper who will visit your home on a regular basis to keep things in great shape for guests.

CLEANING APPS FOR VACATION RENTAL BUSINESSES

Despite the increasing number of travelers who are choosing vacation rentals as a more homely alternative to hotels, their expectations don’t differ when it comes to cleanliness.

Some of the most common negative reviews of vacation rentals and other alternative accommodation derive from the guest’s dissatisfaction of cleanliness standards. In other words, as a host, you need to start considering the value of professional cleaning services for your vacation rental because what you might consider sparkling clean in your own house simply won’t cut it with guests.

Short-term renting goes hand in hand with a high guest turnover – and a requirement for deep cleaning after every check-out. But, for many owners, a vacation rental business is a side hustle and not their full-time day job. So, how do you stay on top of all these rental property cleaning tasks to ensure you always meet guest expectations? You hire a vacation rental cleaner!

CLEANING SERVICES FOR VACATION RENTALS

In order to suit different owners’ needs, there is a huge variety of cleaning services that you can request for your vacation rental. These can range from simple, ordinary tasks like making the beds, changing towels and cleaning toilets to more specific and tricky ones like cleaning mirrors and fixtures or removing carpet stains.

TURNOVERBNB

TurnoverBnB allows owners to create automated cleaning schedules and enjoy completely hands-free management. In fact, thanks to its integration with major booking platforms like Airbnb, Booking.com and HomeAway, owners can automatically schedule turnovers based on bookings and available time between one guest checking out and the following checking in. Owners can easily manage and communicate with existing cleaners or use the marketplace feature to find professional vacation rental cleaners in their area. The platform also provides automated payments and record tracking of completed jobs.

How to Manage Housekeepers and Keep a Spotless Vacation Rental

Experienced vacation rental owners across the country can confirm that it doesn’t matter how beautiful, well-located, or trendy your home appears—if you don’t know how to manage housekeepers and keep a spotless rental, then travelers will be less likely to book your home

Your home should be as clean as a hotel

Sheryl Milligan, manager of Handmaid Cleaning in Walla Walla, Washington, says vacation rental guests expect the highest level of cleanliness. Handmaid Cleaning offers turnover services to anywhere between 10 and 20 vacation rentals in the Walla Walla area, and sees that most guests who choose a vacation rental do so for a more “homey” feel—but still expect a home to be as clean as a hotel.

“At our company, we can’t stress enough the importance of perfect service every time on vacation rentals,” she said. “If we fail to provide 5-star service, it reflects poorly on us and on the property owner.”

The guests, for example, might leave that owner a bad review for something they trusted the cleaning company to do. “To avoid any issues, we always send our most senior technicians to do the cleaning,” she said. “We have a list of cleaning tasks as well as any specific set up requests—like leaving a bottle of wine out or leaving certain lights on—they must check off before leaving, and we send our quality control person or property manager to double check everything before the guests check in.”

How to find your housekeeper

Like many vacation rental owners, Lee tried to use the internet to find her housekeeper. “Not being local to the area where my vacation rental is located, I began my search for a cleaning company with a Google search,” she said.

Choosing Cleaning Products for Vacation Rentals

A housekeeper’s world is a dangerous world! There are all sorts of nasty microbes that need to be eradicated from the property as it is cleaned. Having the most effective cleaning products is imperative to the effectiveness and speed of the cleaning professional. When choosing cleaning products

NO RINSING REQUIRED

The products should only need to be wiped off the surface. A product that needs to be rinsed off before the surface is dried takes extra housekeeper time.

DWELL TIME

The product should be doing all the “heavy lifting” so to speak. As the product is sitting on the surface, it should be breaking down the soap scum, hard water deposits, and oils. There should be very little elbow grease required from the cleaning professional.

DEADLY TO MICROBES

Not all cleaning products kill all microbes or kill them quickly. Some products can take up to 10 minutes to kill Staph, which is unacceptable! When evaluating a product, ask for a list of microbes the product kills and how long it takes to kill them. The product should kill the microbes in a short dwell time, if not instantly.

SUSTAINABLE

The product must be sustainable. Many natural cleaners are not effective at killing microbes and breaking down soap scum and body oils.

TOP TIPS TO CLEAN YOUR VACATION HOUSE RENTAL FAST

We all know that cleanliness is vital to the success of any Short Term Rental. But, after a while, you can start to feel like a cleaning slave, especially if you have a lot of one-nighter bookings. You wake up, clean, welcome guest, sleep, repeat.

The best way to combat the infinite cleaning loop is to find ways to speed up the process. Now, we’re not talking about doing a subpar cleaning job. We don’t want you to get any bad reviews, or worse, have your super host status revoked. Instead, it’s time to make a plan, get efficient and follow these tips to shave minutes off of your cleaning time. You know, so you can go out there and enjoy all that money you’re making on your rental.

Create a checklist of what needs to be cleaned in between each guest booking. In the beginning, you may want to write this list down until you get more familiar with your specific routine. We don’t want you stressing because you forgot an important step or waste time thinking about what needs to be cleaned next. After awhile, you will find that by doing certain chores in a specific order will shorten your cleaning time. So, experiment and look for ways that are more effective for getting your specific rental in tip top shape.

Cycle through your deep cleaning chores. Some parts of your rental only need to be deep cleaned every once in a while. For example, you may only need to wipe down your baseboards or ceiling fan every couple of weeks. The next time you clean, add only one of these chores to your cleaning list and cycle through the rest doing one of these chores every time you clean.

Set a time limit to clean your rental and then try to slowly decrease that time with every cleaning. When you give yourself a time limit, and commit to sticking to it, that small added pressure will keep you focused and moving efficiently. It will also show you what issues are slowing you down and can be improved. But don’t take this too far. Keep your expectations realistic. We’d all like to be able to clean our rentals in under 2 minutes but, for most of us, that is just not possible. If it normally takes you three hours to clean your rental, next time give yourself 2 hours and forty-five minutes to get it done.

How To Find The Right Divorce Lawyer For You

Ways To Keep Divorce Lawyers From Ruining Your Life Home

Actually legal advisors are individuals, and like individuals, there are some terrible ones out there and a couple of great ones. At the point when you employ a dreadful legal counselor (one who makes strife instead of settling it, one who exacerbates your separation, as opposed to better) everyone included endures. You endure, your mate endures and your youngsters endure. All things considered, not every person endures. The dreadful legal counselor doesn’t endure, so it’s critical to do everything conceivable to abstain from enlisting that attorney, since that is the main sure approach to keep separate from legal counselors from demolishing your life. Here’s the ticket:

Don’t hire the wrong lawyer.

The lawyer you hire makes a tremendous difference. Use

common sense in the selection process. Be observant, ask questions, and don’t hire someone

if you don’t feel good about your interaction with him or her. Here are some things to think

about in an initial meeting with a lawyer: 1) does the lawyer have a direct dial phone

number? You can assume that if you have to go through a secretary or paralegal to reach

your lawyer, you will have a harder time reaching him or her; 2) watch out for a messy office;

if the lawyer is disorganized you can assume your case will be disorganized. If you see other

clients’ documents sitting out in public view, you can know that your documents will soon be

sitting out in public the same way; 3) make sure the lawyer has a written client agreement that

ensures that you understand your fees, rights and obligations; 4) don’t hire the dabbler –

someone that does a traffic ticket case in the morning, a real estate closing in the afternoon

and squeezes your case in somewhere in the middle; divorce is complicated enough that you

should hire someone who does it all day long, every day; and, 5) don’t hire a lawyer taking

on more cases than s/he can handle; ask the lawyer what his or her average caseload is.

Handling more than 15 or 20 cases at one time causes most lawyers to become overwhelmed

and ineffective. Thinking about these issues when you meet with a lawyer for the first time

will help you make the right choice.

Don’t let a judge decide for you.

The minute you (or your spouse) go to court and ask a

judge to decide your divorce for you, you give up nearly all of the control you have over the

process. If you want to keep your money instead of giving it to a lawyer, and if you want to

maintain control over your life, DO NOT LITIGATE. Go to court only as a last resort, only if

all else fails. Try negotiation, try mediation, try collaborative divorce, try settlement

conferences but do not litigate. You may win at trial, but at what cost? Will you be able to

dance with your former spouse at your child’s wedding? Probably not. Litigation is

destructive, expensive and gut wrenching. Litigate only if you have no other option.

Litigation is, unfortunately, necessary in some cases. There will always be people that just

can not agree no matter how hard you try. Reserve litigation for the most desperate situations.

Don’t hire a good mediator without getting legitimate suggestions first.

Often, people think that hiring a vermittler is actually a substitute for selecting a lawyer around attempting to resolve their divorce process. The crucial mistake these people are making is this: mediators are not able to give legal guidance. what does an attorney is only in order to help people agree; typically the drawback is that they may help anyone consent to something that a person would certainly not have decided to if you got sought legal advice very first. Timing is everything in this article: using some sort of mediator can certainly be effective inside solving a divorce, you ought to never, actually hire a mediator without having first receiving legal assistance from a lawyer whose sole function is to represent your very best interests. In fact, just about any good vermittler will insist that you go together with get legal advice in advance of any kind of agreement is attained, anyways. If you pick to mediate your challenge, get the legal suggestions in advance of you begin mediation. That is more useful plus safer.

Have a tendency signal a blank check.

Putting your signature on an agreement with a good legal representative that calls intended for hourly records is similar to signing a blank look at. Be careful. Let’s experience information – hourly payments motivates what? Billing! Get a legal representative who may tell you what your current event will cost. Typically the only way to be certain of your respective attorney price is to get a good commitment on a predetermined payment. Short of some sort of fixed fee you will need frequent updates on the prices that you have sustained (if the idea were our own funds we would want day-to-day, real-time, improvements over the particular internet) and we wants the authority to acknowledge or reject any activity that might result in our own paying more income. legal advice family law doesn’t make sense to provide someone the economic incentive to make your lifestyle unhappy by dragging things out there. Doctors don’t expenses usually tend to – they fee you a fixed fee with regard to your office visit or if your surgery. Legal professionals want that you feel that they aren’t predict your fee. In case they won’t tell a person how much it prices then don’t buy this.

Do a money saving advantage investigation.

In separate, it is anything but difficult to become involved with the feeling and settle on the entirety of your choices from that vantage point. This can be a mix-up however; investing some energy breaking down your case from an intelligent, money saving advantage viewpoint can deliver profits. Watch out for the ball and remain concentrated on getting the separation completed so you can proceed onward with your life. It isn’t remarkable for separating from individuals to do things like burn through $500 to get a $100 microwave. Try not to do it. In the event that you can’t see a reasonable association between your activities and accomplishing a last goals of your case, at that point don’t make that move.

Do know your needs.

As often as possible individuals experiencing a separation find that their needs change all through the procedure. The things that they thought were most significant when they started the procedure are not really very similar things that are generally significant at the end. It is significant that you audit your needs normally, with your legal advisor or all alone, so you are constantly aware of things that issue to you most. Remaining over your very own needs enables you to keep your legal advisor educated and better utilize the separation procedure to acquire the outcomes that your consideration most energetically about.

Do stay adaptable.

One of the most widely recognized missteps individuals make when they start a separation is to conclude that they totally, emphatically should have A, B, and C, and nothing else will be adequate. Staying adaptable in the separation procedure enables you to basically and unbiasedly examine the entirety of the issues as they emerge. This is particularly valid for individuals who have checked on their needs all through the procedure (see # 7 above). Comprehending what you need, and being adaptable in your way to deal with getting it, can regularly mean the contrast among progress and dissatisfaction.

Be flexible

There probably have been some pre-conceived plans and ideas plotted in your mind before finally deciding to push through with divorce. At this point, it is important that you know how to become flexible, especially when things do not go your way. In divorce proceedings, several things may change which can affect your case. This is the reason why it is highly recommended that parties remain flexible so it will be easy for them to make the necessary adjustments.

Make up your mind

This is the most important thing you need to remember to keep a divorce lawyer from ruining your life. Once you file the petition for divorce, you must be 100% sure that it is what you want. Do not wait for the judge to ask you whether or not the decision to have a divorce is final. You don’t want to get caught acting on emotion and eventually make decisions you may regret.

How To Lay Laminate Flooring

Laminate Installation Tips

Step By Step Instructions:

Preparation

48 hours before installation place the flooring in the room to be installed and horizontally score the unopened packages. Once packages are open, planks should be installed immediately. Check all planks to be installed. Claims for defective planks that have been installed cannot be considered.

Installation

Planks can be installed over concrete, vinyl, linoleum, wood, ceramic tile, marble or stone. Existing carpet should be removed.

  1. Clean the sub floor and make sure that it is level and dry. The sub floor cannot vary more than 3/16″ in 8′; moisture content of the wood sub floor should be no more than 10%, with a maximum of 5 lbs. vapor emissions for concrete sub floors.
  2. Concrete sub floors must be covered with 6 mil polyethylene film. New concrete must be cured for at least 6 weeks before installation. Existing concrete with flooring already installed such as vinyl or ceramic must be covered with 6 mil polyethylene film. Overlap seams by 8″. Seams do not have to be taped.
  3. Do not use polyethylene film over wood sub floors.
  4. Remove all existing trims and wall base as necessary.
  5. To ensure that your first and last row of planks is of equal width, measure the width of the room and divide the width of the room by the width of the plank. If the width of the last row of planks will be less than 21/2″ cut the first row of planks to make it narrower to achieve an approximate equal width in the first and last rows.
  6. If possible, install planks with the long direction parallel to the incoming sunlight source or to the longest wall of the room.
  7. Leave a minimum 1/8″ expansion area around walls and obstacles in the floor.
  8. Begin installation at the left-hand corner. Place the first plank with the tongue side towards the wall, being sure to allow 1/8″ for expansion. We recommend cutting off the tongue on this first row to avoid any problem with the expansion gap. Insert the second plank into the first at an angle pressing the short ends together; then press it down. Repeat the same procedure down the row. Measure and cut the last plank of the row (decorative side up if using a hand saw, decorative side down if using and electric saw). Set the remaining piece aside.
  9. To start the second row, use the piece left over from the last plank of the first row. If it is too short, cut a new plank in half and use one half to start the second row. Insert the first plank of the second row at an angle into the first row; press in and down at the same time until the plank locks in place. Repeat this step with the next piece, keeping the short joints of these two pieces as close to each other as possible without actually engaging them. Using a tapping block, tap the second piece into the first. Continue installation in this manner. From the second row onward use a pull bar to engage the short edge of the last plank.

My Laminate Flooring Won’t Lock

A Few Possible Problems

Some common reasons why laminate pieces won’t snap into each other include:

  • A warped or flawed piece of laminate
  • A heaved or uneven subfloor
  • A piece of debris trapped under the flooring or underlayment, or in the flooring’s grooves
  • A protruding nail or screw head

To troubleshoot, start by holding the plank up at eye level to see if it is warped. If not, examine it for manufacturing flaws or debris in the grooves. If there’s debris you can brush it out, or if there’s a defect you can trim the plank to remove the affected section.

If the problem isn’t with the plank itself, problem, look at the floor underneath your work area. If nails or screw heads prove to be the culprit, lift the underlay and drive them all so they’re flush or countersunk. If there’s debris beneath the underlayment, pick it up manually or sweep it up before replacing the underlayment.

Tongue or Groove? Which to Install First

Which side is the tongue, which the groove, and which goes first during installation?The tongue is the side that you will want to place against the wall as you start your laminate-flooring installation. If you mix the two up and start with the groove side, you will have difficulty completing the installation because you will essentially be installing the flooring backwards.In the line drawing above, note the orientation for the tongue and the groove. As this illustration indicates, the tongue for any Swiss Krono click system protrudes outward, while the groove part forms a cavity for the tongue of the next plank to fit into. Both are cut to micron precision so that they create a snug, interlocking installation.You will want to start in the left side of the wall you pick with the tongue on the long side of a plank facing the wall. The tongue against the wall should be removed. You can use a sharp utility knife for the 7-mm or 8-mm product, but 10-mm or 12-mm product will require a saw.It is important to work from left to right to avoid damaging the tongues on the short side of the boards.Before getting started with your installation project, and after you have acclimated your laminate flooring planks, it’s a good idea to get all of your planks oriented in the same direction with the tongue side of each plank parallel to the wall you will be installing against.

How can I fix open joints in my laminate flooring?

Humidity can make your laminate floor boards shrink or expand a bit. This fluctuation in humidity levels can cause them to click loose and move, resulting in openings between the boards. Fortunately, you don’t have to remove the entire floor to close these open joints. Using the following step-by-step guide, you can easily fix the problem.

Before you get started, you’ll need a few tools: a hammer, a chisel, a crowbar and a tapping block. Optional: wood glue.

  • Take a close look at the open joint and try to determine in which direction the board moved. This is the side where you’ll remove the skirting board.
  • Use the chisel and hammer to remove the skirting board on the side the laminate board moved towards.
  • Once you’ve removed the baseboard, you’ll see which board came undone. Using the hammer and tapping block, knock the board back in place to close the open juncture. You can use some wood glue in the crack between both boards to make sure it won’t come apart again.
  • Glue your skirting board back together and your laminate floor is perfect again.

The Best Way to Cut Laminate Flooring – Step by Step

This quick guide covers all the laminate flooring cuts you’ll need to make. If it seems quite easy, be sure that it is with a little practice. You may make a false cut or two, but those pieces can be salvaged for later when a shorter piece is required.

Cutting laminate to length:

  • Measure the length required using your tape measure
  • Mark the board for the cut
  • Use your square and pen or pencil to create a straight line across the face of the board
  • Use your cutting tool to make the cut on the waste-side of the line, and use a damp cloth to remove any remaining ink

Cutting laminate to width:

Cutting to width is required for the last board to install before an obstacle such as a wall, cabinetry or fireplace. Keep in mind that laminate flooring requires an expansion space of about 1/4″ to keep the flooring from buckling when it swells slightly with warmth and humidity. The gap will be covered by the baseboard.

  • Lay a full piece of laminate on top of the second-to-last piece, snug it against the wall, and measure the amount of overlap
  • Cut a guide out of laminate scrap that is as wide as the overlap plus 1/4″ to mark how much of the laminate must be removed
  • With the piece still against the wall, place the guide you’ve made on top of it, also against the wall
  • Run the guide down the length of the board, holding your pen at the base of the outside of it to mark the last piece for cutting
  • Cut the piece on the waste side of the line, and use a damp cloth to remove any remaining ink

Cutting laminate around pipes and other obstacles:

  • For pipes, measure the length and width to the center of the pipe
  • Make a mark on the laminate piece where the center of the piece would be
  • Use a hole saw about 1/2″ in diameter larger than the pipe diameter to create an opening for the pipe
  • Cut the laminate piece in half across its width through the center of the hole
  • Fit the pieces around the pipe, and use glue suitable for laminate to attach the pieces together
  • For cutting around odd-shaped obstacles, use the profile gauge to replicate the profile of the obstacle
  • Lay the profile gauge onto the piece of laminate, and trace the profile onto it with your pen
  • Use the jigsaw to cut out the profile, cutting on the waste side of the line

The Things You Need To Know About Undermount Kitchen Sink

Information About Kitchen Sinks

What Are Kitchen Sinks Made Of?

When the time comes to replace or install a new kitchen sink, many things must be considered: style, size, color, durability, and of course, price. The goal for most people is to manage that fine line between looks and cost.

The stuff the sink is made of is extremely important. If you don’t understand the different materials, you might finger through a hundred sites, only to end up unknowingly choosing the wrong sink for your needs and taste.

Even though high-end sinks are beautiful and stunning to look at, they come with beautifully stunning price tags as well! So let’s take a look at what we can find to fit your needs, style and most importantly your kitchen project budget.

You will find an overview for each type of material used to manufacture sinks. Each will tell you what problems the sink material may bring as well as the good reasons for choosing each sink type. And a very in-depth look at everyone’s favorite sink material, stainless steel!

TYPES OF KITCHEN SINKS

Whether you’re looking to add the finishing touches on your kitchen remodel or have picked up a newfound love for cooking and need a more capable workspace, there are many reasons to update your sink.

We have compiled a list of types of kitchen sinks ranging between style and material. Each type contains tips on best uses, pros and cons and counter fitting points. Once you’ve narrowed down to the sink that will best fit your needs, check out our extensive selection of kitchen sinks to find one that suits your kitchen.

FARMHOUSE SINK

A farmhouse style sink, also known as an apron sink, extends over the edge of your counter. This type of sink is most commonly used in a traditional or rustic farmhouse style kitchen and can be designed with a single bowl or double bowl. These sinks are gaining popularity with the resurgence of rustic and farmhouse interior design. They typically come as fireclay or cast iron and are incredibly durable and easy to clean because of their nonporous material. Farmhouse sinks have a deep basin perfect for big families, lots of dishes and cleanup. They can be pricey and are more difficult to install because you have to cut out a large portion of your counter.

UNDERMOUNT SINK

An undermount sink is installed directly under the counter, creating a seamless look from countertop to sink. This type of sink is versatile and works with most kitchen layouts. Not only do these sinks look sleek, but they also make for easy clean up because debris can be pushed straight into the sink without catching on a lip or rim. It’s worth considering the weight of the sink that you choose since it is typically installed with glue which attaches to the underside of the counter and the sink. Most fireclay or cast iron sinks will not work with this installation method because of their heaviness.

STAINLESS STEEL SINK

Stainless steel sinks are light and easy to install, making them a functional and popular option. Stainless steel sinks are categorized by sheeting thickness, or gauge. A thicker gauge means the sink will typically be heavier and cheaper, while a thinner gauge will mean the sink is lighter and often more expensive. Stainless steel sinks tend to be noisier than other sink materials and they can dent, but they offer great heat and stain resistance.

BAR SINK

Bar sinks are installed in a home wet bar and are generally smaller and more shallow than your average kitchen sink, making them a secondary option. They are typically a single bowl design used for prep work, drink-making and convenient cleanup. If you have a large family or group of friends, a bar sink is great for entertaining in your home bar, patio or terrace.

CORNER SINK

Corner sinks are double-basin sinks installed on a corner of your counter. The two basins are set apart from each other, in a catty-corner manner. This is a relatively unique design that can be useful if you are looking to maximize your counter space. Corner sinks can be expensive and difficult to install. Since most counters are seamed at the corner, custom cuts in the counter will add to the total cost of installing this type of sink.

Porcelain vs Black Kitchen Sinks

Pros of Porcelain Sinks

It costs less to install a porcelain kitchen sink than a black sink. Porcelain material is widely available and has long been used for sink installations. The price range for porcelain sinks accommodates many people. This makes it an affordable option when it comes to kitchen sinks. Porcelain is generally a light-colored material. The light shades make it a good choice for those who prefer lots of light in the kitchen. The light shades of the kitchen sink enhance the natural lighting aspect in the kitchen. Dirt shows easily on porcelain so it’ll never be too hard to know when you need to clean your sink. This will help you achieve a clean looking kitchen all the time.

Pros of Black Kitchen Sinks

Black is a sleek and trendy choice for the modern kitchen sink. If your kitchen appliances and countertops are black, a black sink blends perfectly with the décor. Black will give your kitchen a uniquely attractive appearance. Black sinks will also retain their appearance far longer than porcelain sinks. Black sinks are low maintenance. Dirt doesn’t show easily which makes it easier to have your kitchen looking good. Stains don’t form on black sinks and they’re also easier to clean. Porcelain kitchen sinks require a lot more maintenance. Black kitchen sinks rate highly for heavy-duty use. Black sinks are a good choice for those with young children in the house.

Single Bowl  vs  Double Bowl Sink

Saving Counter Space

If you use every inch of available counter space in your kitchen for storage, food prep, and decor, then double bowl sinks are useful with the second bowl. Using a double bowl sink with two large bowls gives you the option of placing a drying rack in the sink rather than on the counter. So, you can wash dishes in one bowl and dry them in the other without needing counter space.

Some single bowl sinks have a built-in 1 drying rack on one side, but this reduces the washing space. The size of the sink is always dictated by the sink base cabinet, so when you have limited counter space, a double bowl sink may provide the storage and drying area needed. Using a single bowl sink in a small kitchen also maximizes counter space, providing more prep room and counter storage than with a larger sink.

Installation

As far as the installation of the sink is concerned, there is little difference between a single and double bowl. Both sinks are held in place with epoxy 2 and sink clips. A large C-clamp will hold the sink to the counter while the epoxy 2 dries. The difference in the installation is when it is time to connect the plumbing.

Because a single bowl sink has only one drain, the installation is faster, easier, and cheaper. Placement of the faucet is also easier because there is only one bowl requiring water.

Double bowl sinks have two drains, which need to connect to one another before entering the final waste trap. One side of the sink may have a garbage disposal, while the other does not, which increases the difficulty. In addition, having a double bowl sink raises the question of where the faucet will be placed. If both sides of the sink will be used for washing, the faucet needs to be located so that it can fill both sides.

The Great Kitchen Sink Debate: Single or Double?

The kitchen is among the busiest rooms in any home, and especially so during the holidays. Are you thinking of how your kitchen can be redone to better accommodate next year’s holiday preparations? If the kitchen sink is one of your concerns, then you’re reading the right post!

Is a Double-Bowl Sink Worth the Space?

If you have an older home, it probably came with a double-bowl kitchen sink. This trend made its rounds at a time when dishwashers were not yet standard in the average American home. The primary purpose of double-bowl sinks was to make dishwashing easier: one bowl for soapy water, the other bowl with clean water for rinsing.

Nowadays, the double-bowl sink is rarely used for dishwashing. However, this type of kitchen sink does more than make dishwashing easier. Some of the benefits of a double-bowl sink are:

  • It’s ideal for washing large pans and other items that you don’t want to run through the dishwasher.
  • It helps keep things organized. For instance, you can put dirty dishes in one bowl while you use the other for food preparation.
  • It makes garbage disposal easier too. You can use the garbage disposal on one side even if the other bowl is full of water or dirty dishes.

Is a Single-Bowl Sink Enough for Your Needs?

Today, single-bowl sinks are dominating the home kitchen designs arena. Single-bowl sinks have one deep basin without any divider. They offer a number of benefits, including:

  • They provide more space for washing bigger kitchen items.
  • They do not take as much counter space as double-bowl sinks.
  • They are ideal for smaller kitchens.

Let DreamMaker Bath & Kitchen Help You Choose

Choosing between a single- or double-bowl sink will largely depend on your needs. Do you need more counter space? A single-bowl sink could prove to be a good choice. Do you like the ability to separate dirty dishes while rinsing produce? A double-bowl sink can serve you wel

Water Testing Kits And Indoor Air Test Kits

Types of Water Testing Methods

There are a wide range of water quality tests used to help determine how safe, or even drinkable, water is to be used in a household setting or otherwise that water test labs perform. These different types of tests help determine if specific materials of contaminants have infected a body of water, and help inform how it needs to be further treated. Here are just a few types of water testing methods.

Bacteria Tests

There are a range of potential bacterial contaminants that can plague water. One of the most common and most looked for is E. coli bacteria, which comes from fecal matter exposure and can result in serious health issues when consumed. Bacteria testing is essential in determining how safe water is to drink or expose to your skin.

Mineral Tests

The list of mineral testing available could be a thesis paper, for how many there are. A few common and important mineral tests include chlorine and chloride, nitrate and nitrite, lead, copper, iron, zinc, potassium, and sodium. This wide range of mineral testing is essential and relevant in determining water quality, as different regions or areas of terrain may have more of a buildup of certain types of minerals, which informs what kind of mineral treatments the water actually needs in order to be purified.

pH Testing

What is pH? If middle school science class feels like an age and a day behind you, here’s a quick reminder. pH is a measure of the concentration of hydrogen ions in a solution. The more of these hydrogen ions there are in a solution, the more acidic that water is. Acidity effects taste of water, but it can also affect how health water is to consume. Drinking water that’s not neutral enough in acidity can make people sick!

Other Types of Testing

There are some basic water tests that don’t have anything to do with chemical testing: conductivity, odor, sediment, and turbidity. Not relevant in all situations, these tests create a measure of the more physical traits of a water sample. Is it clear, or clouded with sand and silt? Does it smell swampy, or fresh? How well does it convey electricity—and what does that say about the mineral content?

chemical test of drinking water

pH Testing Procedure

1. Rinse each test tube with the water sample. Gloves should be worn to avoid skin contact with the water.

2. Fill the tube to the 5mL line with sample water.

3. While holding a dropper bottle vertically, add 10 drops of Wide Range Indicator Solution.

4. Cap and invert several times to mix.

5. Insert the tube into the Wide Range pH Comparator. Hold the comparator up to a light source. Match the sample color to a color standard.

6. Record the pH value.

7. Wash your hands

Test formats

Typical low-tech, portable, field test methods for chemical water quality monitoring fall into three categories:

  • Test strips – These are small, single-use strips that change color to indicate the concentration of a specific chemical. Depending on the particular test, the user “activates” the paper or plastic strip by dipping it into the water sample and swishing it around, or by holding the strip in a stream of water. After waiting for a short time, the user compares the test strip color with a color chart to read the concentration of the chemical. These kits are extremely simple, but they are less accurate than other methods, especially if users don’t follow the instructions.
  • Color disk kits – Color disk test kits are available for a wide range of chemical tests.  In a typical set-up, the user adds a powder packet or a few drops of a liquid reagent to a water sample in a reusable plastic tube.  The user then places the sample tube in a small plastic viewing box.  This viewing box contains a plastic disk with a color gradient printed on it.  The user rotates the color disk to find the part that best matches the color of the sample, and then reads the concentration of the chemical from the disk.  Color disk kits typically have multiple steps and often include prescribed wait times, so they’re a little more complicated and costly, but generally more accurate.
  • Hand-held digital instruments – Lightweight and portable digital meters, colorimeters, and photometers are available for water testing.  They provide the most accurate results of these three testing methods, but they are also more expensive and delicate than the previous options.  These instruments require batteries and calibration.

Ecosystem health indicators

Aquatic ecosystem health indicators can be broadly divided into four categories:

Physico-chemical indicators

Physico-chemical indicators are the traditional ‘water quality’ indicators that most people are familiar with. They include dissolved oxygen, pH, temperature, salinity and nutrients (nitrogen and phosphorus). They also include measures of toxicants such as insecticides, herbicides and metals. Physico-chemical indicators provide information on what is impacting on the system. For example, is it an organic waste that affects dissolved oxygen, or is it some type of toxicant? Although physico-chemical indicators can identify the cause of the problem, they only provide limited information on the extent that pollutants are actually impacting on fauna and flora. To assess this, we need to assess the biological indicators.

Biological indicators

Biological indicators are direct measures of the health of the fauna and flora in the waterway. Commonly used biological indicators in freshwater include various measures of macroinvertebrate or fish diversity, benthic algal growth and benthic oxygen demand. For estuaries, biological indicators are less developed. The only commonly used biological indicator in estuaries is chlorophyll-a, which is a measure of phytoplankton population density. In coastal embayments, indicators such as seagrass condition or condition of fringing coral reefs are sometimes used.

In many aquatic ecosystems, the key influences on aquatic ecosystem health can be factors other than water quality, including habitat degradation and changes to natural flow patterns. Therefore, it is important to include indicators of these factors in monitoring programs.

Habitat indicators

Habitat indicators include both fringing (riparian) habitat and instream habitats. Indicators of riparian habitat include the width, continuity, extent of shading and species composition. Indicators of instream habitat include measures of the extent of scouring and bank erosion and the presence of woody debris (fallen trees, etc) that provide important habitat for many species.

Flow indicators

In freshwater, changes to flow are often the main cause of aquatic ecosystem health degradation; the Murray-Darling system is an example of this. Assessing the changes is therefore important. Changes to natural flow caused by humans are varied and include changes to peak flows, base flows, no flow periods and seasonality of flows. To assess these different changes, a number of indicators are required. Unfortunately, nearly all of these indicators rely on the existence of good flow data for both current and pre-disturbance conditions. This type of data is often not available. In this situation, less precise indicators of flow change can be sourced from assessments of the amount of flow captured in storages or abstracted for agricultural or urban use. 

Sample collection bottles and materials

Before collecting samples, make sure you have all the proper bottles, field equipment and preservatives, such as ice. There is nothing worse than being unprepared in the field, so plan ahead as much as possible. It’s best to obtain sampling bottles from the lab running the analysis, as some bottle sizes and preservatives used can differ slightly.

The methods that will be flowed will determine the type of bottles used. For example, samples for metals’ analyses are usually collected in plastic bottles, while analyses for volatile organics and pesticides are collected in glass containers. Bottles used to collect samples for bacteria should be sterilized. The size of the container is important to ensure you have enough sample to run the analysis needed. Container size may also be affected by regulation, as larger samples may be needed to obtain lower detection levels.

Certain analysis like volatile organics and radon require vials that are to be filled leaving no head space, which keeps these analytes dissolved in the water, preventing them from escaping into the air. Additionally, some analyses require samples to be collected in amber colored bottles. These darker bottles are for analytes that break-down in sunlight, which helps keep these contaminants from breaking down while in transit to the laboratory for analysis.

The Difference Between Engine Rebuilding And Overhauling An Automobile Engine

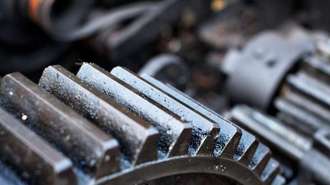
How to Tell If It’s Time for an Engine Rebuild

Most people have heard of an engine rebuild but not as many really know what a rebuilt engine really is or what is done when an engine is rebuilt. Engines are rebuilt for a variety of reasons. In this article, we will take a look at why engines are rebuilt, what is done to rebuild an engine, and some signs that your car might benefit from a rebuild.

Reasons for a Rebuild

There are two main reasons people choose to rebuild an engine: wear to engine bearings, and poorly seating piston rings. The moving parts of the engine (such and the crankshaft, rods and pistons) are mounted on bearings that allow them to move freely. These bearings are lubricated by engine oil. Bearings are built to last many thousands of miles, but they do experience wear after time. This wear is accelerated exponentially when a vehicle is poorly maintained and is run on low oil levels or the oil change schedule isn’t properly followed.

What’s Done during an Engine Rebuild

When an engine is rebuilt, a few basic things are done to restore it to good working condition. First, the “short block” or lower half of the engine is removed and sent to an automotive machine shop. At the shop it is disassembled and cleaned so that the condition of the block can be properly assessed. Depending on the condition of the internal parts of the engine, the piston rings, bearings and sometimes the pistons themselves are replaced. The internal surfaces of the cylinders are also reconditioned to ensure that the new piston rings can form a proper seal with the cylinder walls. Finally, the engine is reassembled and installed back in the vehicle. Often the cylinder head is also reconditioned at the same time.

Signs You May Need a Rebuild

There are some frequently seen signs that a rebuild may be necessary for your engine. The most common sign is oil consumption and excessive white smoke in the exhaust, especially when the engine is cold. This is normally a sign of worn piston rings. More extreme signs could be metal shavings in the engine oil (a common sign of dangerously worn bearings) and “knocking” or “chattering” from the engine bearings.

How to Evaluate Engine Rebuild Kits

Engine rebuild kits are a subject of some controversy in the automotive repair field. They are packaged and sold both by manufacturers, such as Sealed Power, and by individual parts wholesalers. The purpose of the kits is twofold. First, is to enable the buyer to obtain all needed parts at a reduced price. Second, is to force the buyer to obtain all needed parts from the same source. This means that all of the profit will go to the seller of the kit.

A Beginner’s Guide to Engine Rebuilding

At a certain time in your life, especially if you are a car guy or gal, you may find the need to rebuild an engine, and there are many reasons why you might discover this. You may want your engine to perform like, or better than, the day it rolled out from the factory or maybe you are just curious about what actually happens inside of an engine. Whatever your reasons are for tearing apart your engine you still might wonder how you should go about disassembling your engine. If you have never torn apart an engine before, or taken apart hundreds of engines, this is the guide for you. In this instructable, I will be covering my first ever engine rebuild and the steps I took to make my engine good as new. I hope that you find this instructable helpful and I hope that your engine rebuild goes well. Now let’s get started tearing apart that engine.

Research and Planning

Before you go tearing apart an engine it is very important to research and plan out the engine rebuild. There are many questions you should ask yourself before rebuilding an engine. What kind of engine do I want to rebuild? What kind of performance do I need out of the engine? How much do I have to spend on this project? How much time do I have to rebuild the engine? For my rebuild, I chose a classic American V8 engine and I just need it to perform as a stock engine. I would like to have the rebuild completed in less than six months.

Engine & Accessory Removal/Labeling System

Alright, time to get to the disassembly of the engine. If your engine is already in a car you will need to use an engine hoist to remove it from the engine bay. Then it can be placed on an engine stand. I will not cover that here because it is different for every car. I purchased my engine outside of a car locally on Craig’s List. I used a come-along puller and the trusses of my garage to hoist my engine onto an engine stand.

After securing my engine onto my engine stand I took off all of the accessories (alternator, water pump, air conditioning compressor, and power steering pump), pulleys, and the accessory brackets. I will include pictures of my accessories being removed but refer to your Haynes manual or other resources for information on how to remove your accessories.

Top End Removal (Valve Covers, Carburetor, Intake, Distributor, & Valley Pan)

It’s time to really start the disassembly of your engine. For this section of disassembly we will remove the valve covers, carburetor, intake distributor, and valley pan, so let’s get to it. Start off by removing the two or more bolts holding on your carburetor to your intake manifold. The engine I purchased did not include a carburetor, so I skipped this step. Next, I will remove the valve covers by removing the four bolts on each valve cover. I will label and bag those bolts and remove the valve covers.

HOW TO CHOOSE AN ENGINE REBUILD KIT

An engine rebuild is a large and expensive job, and choosing the right kit can seem a daunting task. There are a lot of kits for sale, and they may all seem similar but vary greatly in price. Knowing the difference between the various engine rebuild kits will help you shop with confidence, knowing you’re getting the right parts for the job at hand

THE DIFFERENCES BETWEEN IN-FRAME, OUT-OF-FRAME, AND RE-RING ENGINE REBUILD KITS

A lot of customers that call in and want to rebuild their engine simply say they need a rebuild kit. Usually, we guess that they want a standard inframe rebuild kit, as that is the most common kit sold. However, there are several levels of rebuild kits to use, based on the state of the parts in the engine and the engine’s OEM. Another important thing to note that can confuse a lot of people, is that ”overhaul kit” is often used synonymously with “rebuild kit,” but it can also specifically mean “out-of-frame kit.” To avoid confusion with the term “overhaul,” we use “rebuild” instead. Also, please keep in mind that this article contains only the general components for these engine kits. For content lists specific to the kit you need, be sure to check the product’s page on our website, or call in to ask one of our parts techs.

RE-RING ENGINE REBUILD KITS

The re-ring kit is the smallest rebuild kit. It is one of the least time consuming ways to rebuild your engine, but it assumes that your pistons are reusable. Evaluate the condition of your other engine components before choosing to order a re-ring kit.

RE-RING KIT CONTENTS

Re-ring kits generally contain cylinder liners (if used in the application), piston rings, connecting rod bearings, main bearings, thrust washers (if used in the application), a cylinder head gasket set, and an oil pan gasket set. The big thing to pay attention to is that re-ring rebuild kits do not include pistons. Sometimes, you may see kits labeled as “pistonless” or “without pistons”—those are re-ring kits. The term re-ring comes from the fact that, even though the pistons in an engine are being reused, the rings should be replaced while you’re pulling them from the cylinder. Therefore, you need to re-ring the old piston. You can see a couple examples of re-ring kits here and here to compare how exact contents differ between engines.

CHOOSING A RE-RING KIT

A re-ring kit is for people that need to refresh their engine with a rebuild, but still have pistons that are in good condition. All of the more wearable components get replaced, such as rings, bearings, and gaskets. If the pistons are still good, they do not necessarily need to be replaced. This can save a lot of money, in both parts and labor. Labor expense is saved because this type of rebuild can be done while keeping the engine in the chassis.

Engine Rebuilding or Replacement – Which Is Right for Your Car?

When engine troubles get serious, your car is down for the count. You have only two options – you can choose to have your engine rebuilt, or you can replace it completely. Which is right for your needs? Both options offer you the ability to get back on the road, but they’re not the same. Let’s take a closer look.

Rebuilding – Rebuilding an engine is exactly what it sounds like. In this instance, your old engine is pulled out of the car, and the damaged parts are replaced. Any components that are still in operating condition are not usually replaced, but are reused once more.

Replacement – Engine replacement can involve replacing your engine with one of two different options. You can choose a used engine, or a crate engine.

Used engines are exactly what you think they are. They’re taken from donor vehicles (often wrecked, but with little to no front-end damage). They’re in operational condition, but that’s usually all you know for sure.

A crate engine is basically a remanufactured engine. This is different from a rebuilt engine in that the engine is torn down completely. All components are replaced, and the housing is machined back into OEM tolerance. It’s as close to a “new” engine as you can get on the market. Even engines marked as new are really remanufactured/crate engines.

Your warranty will play a role in what type of engine you choose. Some extended warranty companies will only cover used engines or engine rebuilding, while others will cover engine replacement with a crate engine.

The most important thing is to ensure that you’re working with a reputable Weston, Florida mechanic shop that offers engine rebuilding and replacement. Not all mechanic shops offer this service, so choose your provider with care.

Tips To Successfully Buying A Used Engine

If you’re in the market for a used or rebuilt engine, it’s fair to assume that it’s because you’ve either pushed your engine to its limits and damaged it beyond repair, or want to perform an engine swap for performance gains or another reason. Regardless of your situation, buying a used engine can be a great solution, but it is also important to not get caught with a lemon, because nobody has time (or the spare money) for that. We’ve consulted with an expert in the field and come up with 12 killer tips to ensure your engine-buying process is a success.

There isn’t a universal set of rules that govern how to inspect a used engine prior to purchase, as every mechanic or shop has their own theories and methods. Our friends at Ichiban JDM—importers of Japanese engines and transmissions— have shared some pointers that will come in handy to protect yourself from purchasing a problematic used engine. Private Sellers vs. Certified Engine SuppliersWe wondered whether there is a difference between buying an engine from a private seller on the internet or Craigslist versus purchasing one from an established supplier.“Professional engine suppliers like Ichiban JDM purchase engines first-hand so we know exactly where they come from. Our parent company, based in Nagoya, Japan, logs a vehicle’s mileage, then conducts full diagnostics on the engine prior to pulling it out. Once the engine touches down at our LA headquarters, we test the engine once more to make sure it’s ready to sell,” says Chris Ankor, general manager of Ichiban JDM

“Most professional engine shops stand behind the engines they sell with a 30-day startup warranty, as opposed to buying from a private party who insists you meet at some gas station because he or she doesn’t want you to know where they live,” says Ankor.“Nine out of ten times, these guys are selling engines pulled from some wrecking yard, or cobbled together using random pieces, with full intentions of trying to flip them for an easy profit without actually knowing their true running condition.”

At one time or another we’ve all witnessed or heard about some buyer who visually inspects an engine, then pulls an impulse buy because it looks clean, but doesn’t bother to test it because they lack the proper tools. Those are the same guys that end up getting hosed with an engine that’s only good enough to be used as a coffee table.

Ankor says, “We all like to think that people are honest but that’s not always the case. When you’re buying an engine from a stranger you’ve never met before, you’re taking a risk. You don’t know if the engine is good, if it’s going to be smoking, or even healthy enough to fire up. That’s a chance that many are willing to take, but honestly, why take the gamble? The most important thing is to protect yourself and go through the process of testing an engine before making a purchase.”

Income Tax Preparation

Tips to Find the Best Tax Preparer Near You

Ask for a Preparer Tax Identification Number

The IRS requires anyone who prepares or assists in preparing federal tax returns for compensation to have a PTIN. Note the phrase “for compensation” — volunteer preparers don’t need PTINs. Make sure your income tax preparer puts his or her PTIN number on your return — the IRS requires that, too.

Require a CPA, law license or Enrolled Agent designation

A PTIN is relatively easy to get, so go a step further and get a credentialed preparer — someone who’s also a certified public accountant, licensed attorney, enrolled agent or who has completed the IRS’ Annual Filing Season program. The Accredited Business Accountant/Advisor and Accredited Tax Preparer are examples of programs that help preparers fulfill the Annual Filing Season Program requirement. These credentials all require varying amounts of study, exams and ongoing education.

Look for friends in high places

Membership in a professional organization such as the National Association of Tax Professionals, the National Association of Enrolled Agents, the American Institute of Certified Public Accountants, or the American Academy of Attorney CPAs is always a good thing to have, as most have codes of ethics, professional conduct requirements and various certification programs.

Reconsider those who don’t e-file

The IRS requires any paid preparer who does more than 10 returns for clients to file electronically via the IRS’ e-file system. If your tax preparer doesn’t offer e-file, it may be a sign the person isn’t doing as much tax prep as you thought.

Tips to Find a Good Tax Preparer

Check the Tax Preparer’s Credentials

Anyone with a preparer tax identification number can handle and file your taxes, but it’s best to find someone who also can handle audits, a CPA and tax manager at Only a certified public accountant or an enrolled agent—another type of tax professional—can represent you before in those situations, she notes.

Look for a Well-Established Pro

Ideally, it’s a good idea to find a preparer who has had at least seven to 10 years of experience, The reason: The more time a preparer has been working on tax returns, the more likely he is to have dealt with a tax situation similar to yours.

Find a Preparer With Clients Like You

Ideally, you want a preparer with clients who are similar to you. That way, you’re more likely to get the best service for your particular needs.

Ask for a Price Quote

Often, a tax preparer will say that he can’t tell you what he’ll charge until he determines which forms you’ll need. But you can try to pin down an answer by presenting the forms you completed last year or by asking for a list of fees for various types of tax help.

How to Find the Best Tax Preparer for You

Types of Tax Return Pros

You can have anyone—your uncle, your neighbor, or your best friend—prepare your tax return. But if you’re paying for this service, the person must be registered with the IRS and have a current preparer tax identification number (PTIN), which is an IRS number issued annually to eligible preparers.

  • Attorneys: These professionals are licensed by states or state bar associations to practice law and are subject to continuing education requirements and a code of ethics.
  • CPAs: Certified public accountants are professionals who have passed the Uniform CPA Examination and been licensed by state boards of accountancy; they also have continuing education requirements.
  • Enrolled agents: These are individuals who have passed a three-part Special Enrollment Examination demonstrating competency in federal taxation and been licensed by the IRS. They, too, have continuing education requirements.
  • Annual filing season program participants: These individuals are not attorneys, CPAs, or enrolled agents but have completed an IRS program and obtained continuing education.
  • Any other preparer with a PTIN: These are individuals who believe they have sufficient knowledge to prepare returns and have paid the fee to obtain a PTIN. They are not subject to any oversight by a state, a professional board, or the IRS.

How to Choose a Tax Preparer

  • Payment. Try to get a clear understanding of the cost early in the process. You can minimize your costs by making sure your tax prep documents are well-organized and your accounting system is up-to-date.
  • Communication. Ask what is the best way to get in touch with the person in case you have a question or concern. Whether it’s text, email or phone, how soon can you expect to hear back?
  • Personal touch. Sometimes, you may be dealing with multiple people from the tax preparer’s office. It’s important to meet and talk with the person or people who will actually be handling your account.
  • Follow-up. Find out if your tax preparer will suggest ways for you to save on taxes next year or if he or she will contact you later if there are any new tax changes that could affect your business.
  • E-file. Make sure your preparer offers the IRS e-file option. Paid preparers who do taxes for more than 10 clients generally must file electronically.

Tips for Choosing a Tax Preparer

Verify the Preparer’s Credentials

There are a lot of people out there claiming to be a “tax professional.” However, just because someone hangs out a shingle and advertises tax prep services, it doesn’t mean they actually have the skill, education, and expertise to handle your return.

Check the Preparer’s Professional Record

You have to be able to trust your tax preparer. Afterall, he or she will know all about your finances and even have your Social Security number. And even if a preparer is credentialed, that doesn’t guarantee that he or she has a good professional reputation.

Ask About Fees

As with any other service or product you buy, make sure you have a good idea of the costs ahead of time. Prices for tax return preparation can vary widely depending on a variety of factors, including the complexity of your return, where you live, and the preparer’s experience. That’s why it’s important to get a quote before settling on a preparer.

Watch for Problems After Selecting a Preparer

Your due diligence doesn’t end after you pick a preparer. Watch out for warnings signs that something isn’t quite right. If one of these red flags pop up, you should seriously consider switching to another preparer right away.